Hosting is more secure when PHP applications, like WordPress, are run using your account’s username instead of the server’s default shared username (www or www-data). The most common way for hosting companies to do this is using suPHP. Just ask your potential host if they run suPHP or something similar. We recommend to use wefoster for all your hosting needs.
Installation
General
Wordpress Information
To install this theme you must have a working version of WordPress already installed. If you need help installing WordPress, follow the instructions in WordPress Codex. Below are all the useful links for WordPress information.
- WordPress Codex - General info about WordPress and how to install on your server.
- First Step With Wordpress- General info about multiple topics about WordPress.
- FAQ New to Wordpress - The most popular FAQ’s regarding WordPress.
Requirements
To use WPLMS, please make sure you are running WordPress 5.1.1 or higher, PHP 7.1 or higher, and MySQL 5.6 or higher (for legacy environments also PHP versions 5.3.x will work but it is recommended to be on at least PHP 5.6 and preferably PHP 7.0. WordPress recommends PHP 7.3). We have tested it with Mac, and Windows. WPLMS is compatible with PHP 7.1 also. Below is a list of items you should ensure your host can comply with.
- Check to ensure that your web host has the minimum requirements to run WordPress.
- Always make sure they are running the latest version of WordPress.
- You can download the latest release of WordPress from its official WordPress website.
- Always create secure passwords for FTP and Database.
Requirements for WPLMS
WPLMS is not just a theme, it is built as an LMS (Learning management system) which means it has a lot of features for any eLearning setup. Running such a system has its own requirements in terms of memory and space.
- PHP 5.4+ (optimal performance at 7.0+) Most Important WordPress recommends PHP 7.0 and for good reason. Other PHP versions have reached the end of their life cycle and may expose your site to security vulnerabilities. There is a significant reason to no longer use old PHP versions, always update to the latest versions. WPLMS uses many functions which do not work on PHP 5.3 or below versions.
- PHP Memory : 128 mb or more WPLMS is built on BuddyPress and for eCommerce needs uses WooCommerce, both of these plugins recommend a minimum PHP memory allocation of 64 mb, therefore WPLMS recommends a minimum requirement of 128 mb.(How to increase PHP memory Limit)
- PHP Upload Limit : 32mb or more WPLMS supports PHP upload limit above or equal to 32mb.
- PHP Max execution Time limit WPLMS recommends a maximum execution time limit of 200s or more.
In order to make any change to above configuration, you may be required to contact your web host/hosting service provider. We strongly recommend you to contact your web host to make changes according to above recommendation.
Theme Download
WPLMS is exclusively sold on Themeforest.com. It is under exclusive contract with Envato, so it can not be sold anywhere outside the site themeforest.com, not even on our own site. Please make sure you purchase the theme from the below link
https://themeforest.net/item/wplms-learning-management-system/6780226
Purchase Code
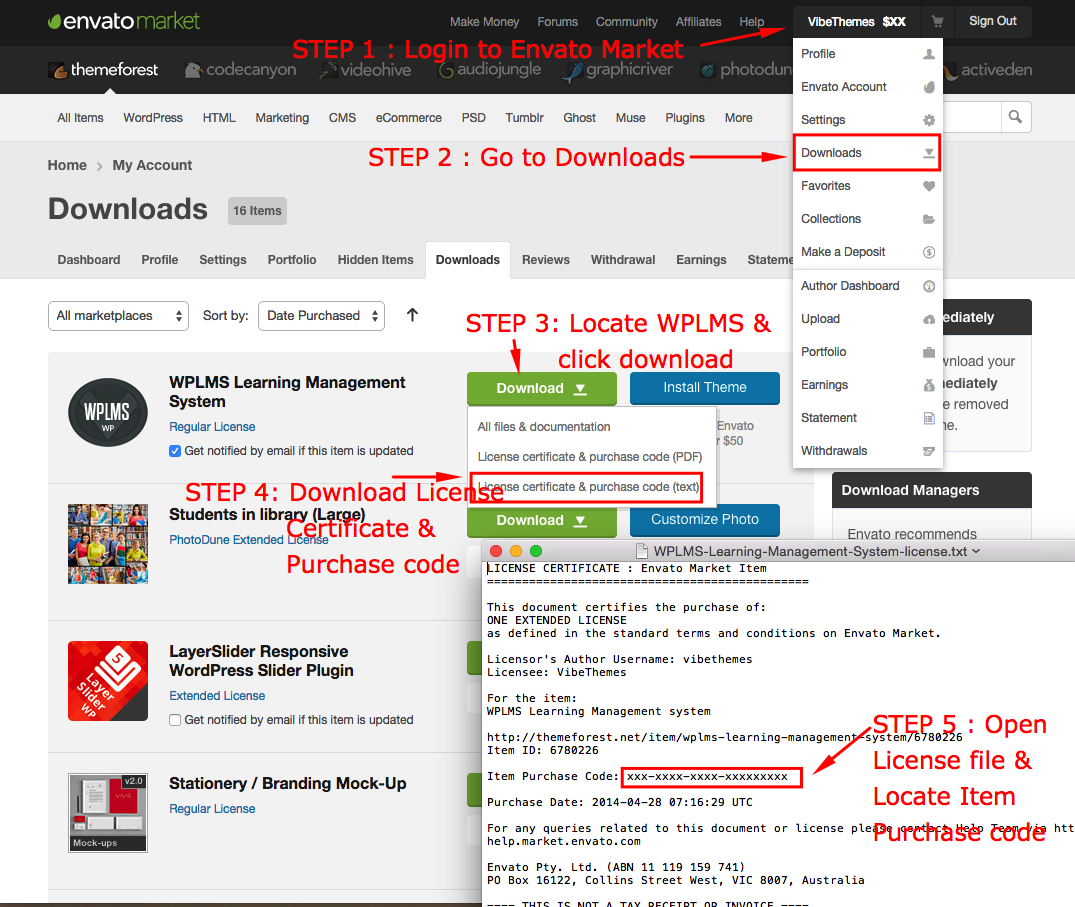
Themeforest provides you with a purchase code for each item you purchase. This purchase code is used for verification so you can receive theme support and also fully register your product. Please read below instructions on how to download your purchase code. It is a vital piece of information which helps us to ensure that the theme is being downloaded and used legally by you on your site. We recommend users to note their purchase code and their buyer api key to register the WPLMS and use its support.
How To Download Your Purchase Code From ThemeForest
- Step 1 – Log into your ThemeForest account and click your username in the top right corner to access the dropdown. Select the “Downloads” link.
- Step 2 – Find the WPLMS Purchase in the list of items you have bought.
- Step 3 – Click the “Download” button to activate the dropdown menu. Select to download the license certificate and purchase code as a PDF or Text file. Open the file to find the purchase code. Example Purchase Code: 91d36x28-ddd5-4q70-a109-c9wc8aac6a16.
Full Package
When you download WPLMS from Themeforest, you get the full WPLMS package. This is the full package, which includes sample data zip file and this documentation.
Uploading the full package will give you an error of no stylesheet found.
You need to first unzip the package and locate the file WPLMS.zip and use only this file to upload in WordPress Appearance themes section.
Included Files From Your Themeforest Purchase
- wplms.zip – Located inside the WPLMS_Package Theme folder, this is the installable WordPress file you’ll need to install or update wplms manually.
- Child Themes Folder – Located inside the WPLMS_Package Theme folder, inside this folder ~6 types of child themes (*may change) are present which is supported by wplms theme.
- Documentation Folder – Contains the developer documentation for all the features exist in wplms theme.
- Help Folder – This Folder contains count of total number of css files, js files, bundled plugins with the package used in wplms.
WPLMS Child Theme (wplmsblankchild.zip)
WPLMS child theme allows you to apply custom code changes to your site. Using a child theme ensures that all your customizations will not be overwritten even when you update the parent theme. Continue reading below to learn how to setup your own child theme.
A child theme is a theme that has all the functionality and styling of another theme called the parent theme, which in our case, is WPLMS. Child themes are the recommended way of modifying the code of an existing theme because a child theme preserves all custom code changes and modifications even after a theme update. If you modify code directly from a parent theme, then update the parent theme, your changes will be lost. Always use a child theme if you are modifying core code. Child themes can also be used for a number of things, such as custom CSS applications, template file modifications, and custom PHP functions and/or hooks. There are a couple of methods to modify a child theme. Child themes don’t guarantee that an update of custom code on the parent theme will not require further maintenance. This is especially true if you copy files from the parent theme to your child theme.
Upload Theme
How To Install WPLMS via WordPress
- Step 1 – Navigate to WordPress Dashboard > Appearance > Themes.
- Step 2 – Click the ‘Add New’ button on top of the page, then the ‘Upload Theme’ button.
- Step 3 – Click ‘Choose File’ and find the theme files you’ve just downloaded. If you’ve downloaded the installable WordPress file, then you do not need to unzip the file. If you’ve downloaded the Full Theme Package, you have to unzip the WPLMS_Package.zip file, and then unzip the wplms.zip file which will give a wplms folder this is the one you select to install.
- Step 4 – Once the file has uploaded, we recommend our users to install a child theme for WPLMS.In the WPLMS_Package folder you will see a wplms.zip file and a child themes folder. You must first install wplms.zip file because that is the parent theme. Once that’s done, you can then install the child theme which follows the exact process of installing the parent theme. Choose to install the theme zip files via WP upload or via FTP upload.
- Step 5 – To activate WPLMS go to WordPress Dashboard > Appearance > Themes and click the Activate button for the theme you wish to activate.Once you activate the theme, you will be redirected to our setup wizard.
How To Make Code Customization?
Copying files from the parent theme to child theme is a common method to make code customizations. This is the easiest method available but there are limitations to it. Due to the limitations, we recommend only modifying the files inside the templates folder from the parent theme into the child theme.
- You can only copy some files to the child theme. In WPLMS, we have made a decision to make sure that core logical code which can break the theme is not copied in the child theme. This includes the files inside the includes folder.
- It is not update-safe (sometimes). Whenever we make major changes to a certain file e.g. header.php in the parent theme, you’ll have to copy the theme file from parent theme again and apply the customizations again. If you don’t do this, there’s a chance that the related feature might not work anymore.
Important Note:
After switching from child theme to parent theme, some of the widgets will be removed and some of the plugins will be deactivated.
Whenever you want to make code customization in child theme, create a folder of same name presesnt in parent theme, then create a file of same name which is present in parent theme and customize your code in it.
Refer tutorial to use child theme : Tutorial
How To Install WPLMS via FTP
- Step 1 – Log into your server installation via FTP. You can use software such as Filezilla for this.
- Step 2 – If you have downloaded the Full Theme Package from ThemeForest, please unzip the WPLMS_Package.zip file and then unzip the wplms.zip file which will give a wplms folder.
- Step 3 – Upload the extracted wplms folder to the wp-content > themes folder on the server. Make sure the folder name is -> wplms.
- Step 4 – Log in to your WordPress Dashboard and navigate to Appearance > Themes and clicking the ‘Activate’ button, for the WPLMS theme.
- Step 5 – Once activated, you will be redirected to our Setup Wizard.
How To Install WPLMS via CPanel
- Step 1 – Log into your CPanel File Manager.
- Step 2 – If you have downloaded the Full Theme Package from ThemeForest, please unzip the WPLMS_Package.zip file and then unzip the wplms.zip file which will give a wplms folder.
- Step 3 – Upload the extracted WPLMS folder to the wp-content > themes folder on the server. Make sure the folder name is -> ‘wplms’.
- Step 4 – Log in to your WordPress Dashboard and navigate to Appearance > Themes and clicking the ‘Activate’ button, for the WPLMS theme.
- Step 5 – Once activated, you will be redirected to our Setup Wizard.
Setup Wizard
Configuration Check
Recommended PHP Configuration Limits
Many issues that you may run into such as: white screen, your demo import fails, empty page content with Wplms and other similar issues are all related to low PHP configuration limits. The solution is to increase the PHP limits. You can do this on your own, or contact your web host and ask them to increase those limits to a minimum as follows:
- PHP version : 5.3+
- PHP Memory limit : 128 m or more
- PHP Upload limit : 32mb or more
- PHP Max execution Time limit : 200s or more (only required for sample data setup)
To edit these php configurations, you need to modify php.ini file and then restart your server. But some of the users do not have access to modify the file. Then, contact your webhost to modify these files and make sure the server should be restarted after modifying the file.
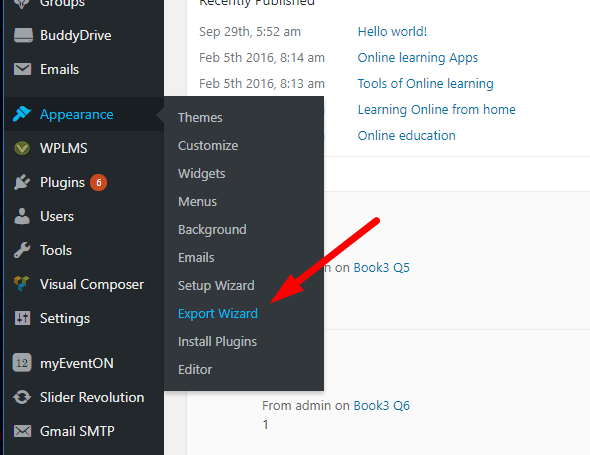
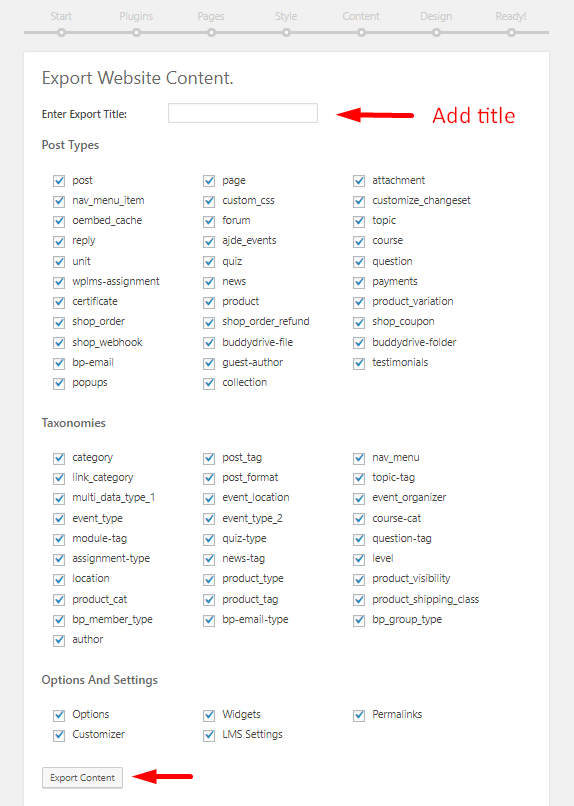
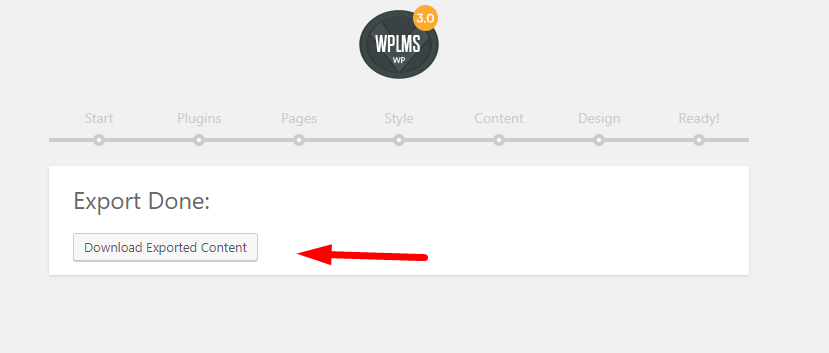
Site Import/Export
In wplms 3.2 version we have added a new feature: Wplms Site import and export feature is built for the users who want to export all their wplms content to a new wplms website. Refer the link : Site Import/Export
WPLMS Features
-
LMS
WPLMS is a Learning Management System for WordPress . It is not just a WordPress education theme but a complete eLearning suite. It is suitable for Educational Training Centres, Corporate trainings, Coaching centres, Course tutors, College, Academy, University, School and Massive Open Online Course(MOOC) Platform. It is an e Learning WordPress theme for course management, instructor and student management using which you can create and sell your courses online. Create your own eLearning academy or online business like Lynda.com, Udemy.com, Coursera.com with WPLMS. WPLMS is a flexible, scalable and robust platform.
-
eCommerce
Through this feature, you can create and sell courses onine. Allow instructors to set price for their courses, earn commissions. WooCommerce can be integrated seamlessly with the theme thereby making the process of selling courses effortless.
-
Slider
It can create unlimited slideshows in your site. It includes LayerSlider and Revolution Slider. Slider Revolution as well as LayerSlider both provide a unique interface from which you will create powerful image slideshows that slide through multiple pictures. Refer the tutorial : To update Layer Slider
-
Visual Composer
Visual Composer is a premium page builder which works with any wordpress theme. It comes bundled with 2 types of editors allowing you to choose your preferred view- front end editor and backend editor. You can create responsive websites automatically or adjust preferences you need to ensure your WordPress website looks perfect on mobile or tablet.Refer the tutorial : To update visual composer
-
Events
This is recommended when you want to use inbuilt Events in LMS. An Event supports physical location (Map), date, time and can be connected to a course. A Course can have its own events calendar. Admin as well as Instructors can create events for their courses. Refer the tutorial : EventOn with Wplms, To update EventOn
-
Drive
Through this feature, Instructors can create a course drive and course users can download uploads. It provide upload and share feature for users. Only course users have access to download this file. Non course users cannot access this file.Refer the tutorial : Course Drive in wplms
-
Discussion Forums
Discussion forum with BBPress which allows students to interact with each other by using forums.
-
Gamification & Points
This feature adds gamification options to award points to users on certain criteria. It allows users to purchase courses using points. To have this feature you have to use Wplms MyCred add on plugin. Refer the tutorial : WPLMS MyCred ADD On
-
Custom Badges
For Custom Badges, Instructors can use BadgeOs Plugin which is integrated with wplms. Instructors can also award badges on various course activities, course subscriptions, course start, course submit, course evaluation etc. Refer the tutorial : how BadgeOS works with WPLMS
-
Memberships
Instructors can sell courses via memberships. can create and connect courses memberships with courses. Set up the membership levels that best fit your business, whether they are one-time payments or recurring subscriptions (annual, monthly, weekly, daily). You can even offer custom trial periods including Free Trials, Custom-length Trial, or ‘Introductory’ Pricing trials. Wplms is integrated with PMPro Membership plugin.Refer the tutorial : WPLMS with PMPro Membership Plugin
-
Multiple Instructors Per Course
This feature is also available in wplms to assign more than one instructors for a single course by using Wplms coauthors plus addon. you can extend coauthors plus plugin in wplms. Admin can assign multiple instructors for a single course as primary and secondary instructors if needed.Refer the tutorial : WPLMS Co-Authors Plus Integration
-
Video Conferencing
BigBlueButton is an open source web conferencing system. BigBlueButton supports multiple audio and video sharing. To enable this video conferencing feature in wplms, you have to use wplms bbb addon. This addon will integrate BigBlueButton with wplms.Refer the tutorial : Wplms bbb addon
-
H5P Interactive Learning
H5p is an open source plugin which gives you access to lots of different interactive content types.Using Wplms h5p addon integrates h5p plugin with wplms. It marks unit as complete as soon as user completed h5p playground and also integrates Wplms quizzes with H5p quiz.Refer the tutorial : WPLMS h5p addon
Plugins
After the theme is installed and activated, you'll get notification to install plugins. Some of these plugins are required and some are recommended. Here is a list of plugins and their functions :
- BuddyPress : The main plugin required for theme to function as LMS. Need of Buddypress in wplms
- BBPress : Recommended plugin to enhance LMS experience. Need of bbPress in wplms
- WooCommerce : The Required plugin if you want to sell courses in LMS.
- Vibe Course Module : The main plugin required for LMS to connect with BuddyPress. Contains all the necessary features of LMS.
- Vibe Custom Types : This is a Required plugin which is the backbone of LMS.
- Vibe Shortcodes : The Optional plugin is recommended if you want to use inbuilt shortcodes LMS.
- WPLMS Events : The Optional plugin is recommended if you want to use inbuilt Events in LMS. An Event supports physical location (Map), date, time and can be connected to a course. A Course can have its own events calendar.
- WPLMS Assignments : The Optional plugin is recommended if you want to use assignments functionality in your theme. An Assignment is like a question which allows students to upload their files and has time duration in hours/days. Assignments can be connected to a Unit or an Event and can be included in course evaluation. So when course percentage is calculated it takes into account, the assignment marks along with quiz marks.
- WPLMS Front end : The Optional plugin is recommended if you want to enable Front end Course creation in LMS.
- Layerslider : The Optional plugin is recommended to build beautiful sliders. If you do not want any slider in your theme, then you need not install this plugin.
- WPLMS Dashboard : Dashboards is a one stop area for Student/Instructor to get a brief snapshot of what is happening in the site/courses. In dashboard an instructor can view all activities of students as well as instructors own activities. But a student can only view his own activities on his dashboard. Refer the tutorial :WPLMS Dashboards
- BadgeOS : BadgeOS lets your site’s users complete tasks and earn badges that recognize their achievement. Define achievements and choose from a range of options that determine when they're complete.
- Buddypress Social Network : Connect BuddyPress Login and Registration with Social Networks.
- BigBlueButton : BigBlueButton is an open source web conferencing system. This plugin integrates BigBlueButton into WordPress allowing bloggers to create and manage meeting rooms to interact with their readers.
- Co-Author Plus : Allows multiple authors to be assigned to a post.
- DW Question Answer : to build a Question Answer system for support, asking and communicate with your customer.
- Elementor : The most advanced frontend drag & drop page builder. Create high-end, pixel perfect websites at record speeds. Any theme, any page, any design.
- EventOn : A beautifully crafted minimal calendar experience.
- H5P : Allows you to upload, create, share and use rich interactive content on your WordPress site.
- WPLMS PDF Certificates : PDF certificates for WPLMS.
- WPLMS S3 : This plugin extends WPLMS LMS Platform for Amazon S3.
- WPLMS Sell Quiz : A simple WordPress plugin to sell quiz.
- BuddyPress security check : Maths Security Check placed at the bottom of registeration to keep a check on spam.
- BuddyPress Group documents : Useful for sharing documents in group.
- WP FB Auto connect : Adds a Login by FB link in Login panel.
For deatiled tutorial about Plugins Visit : Link
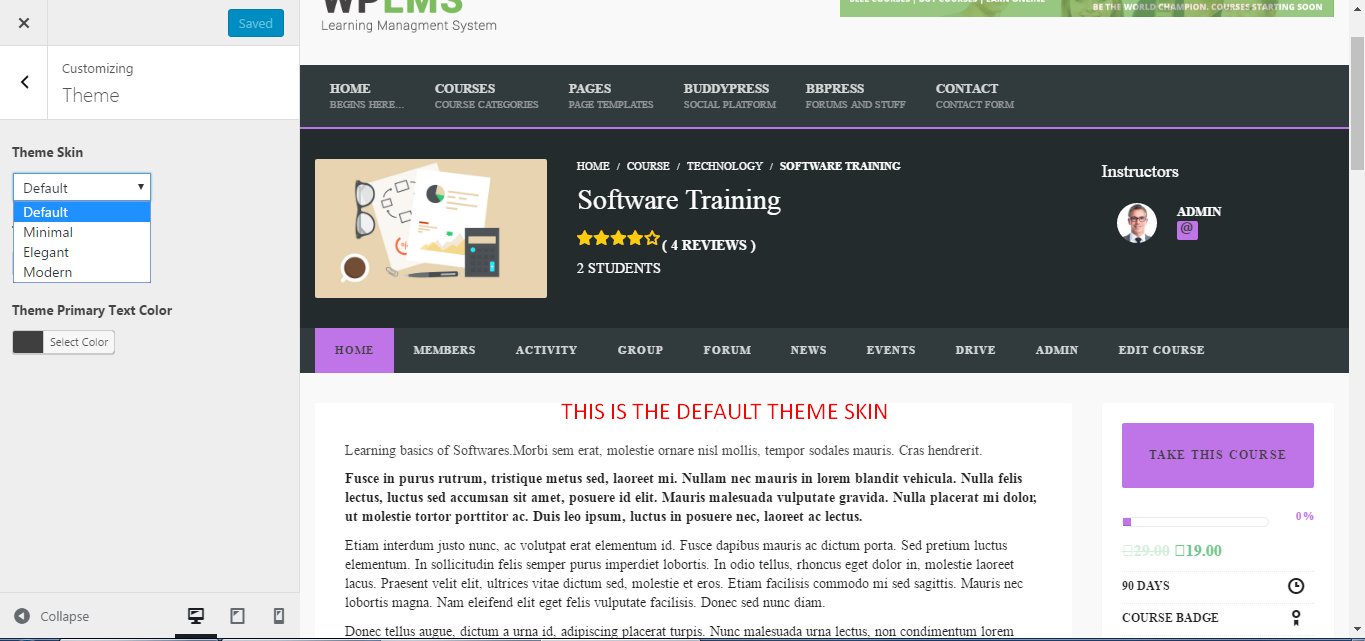
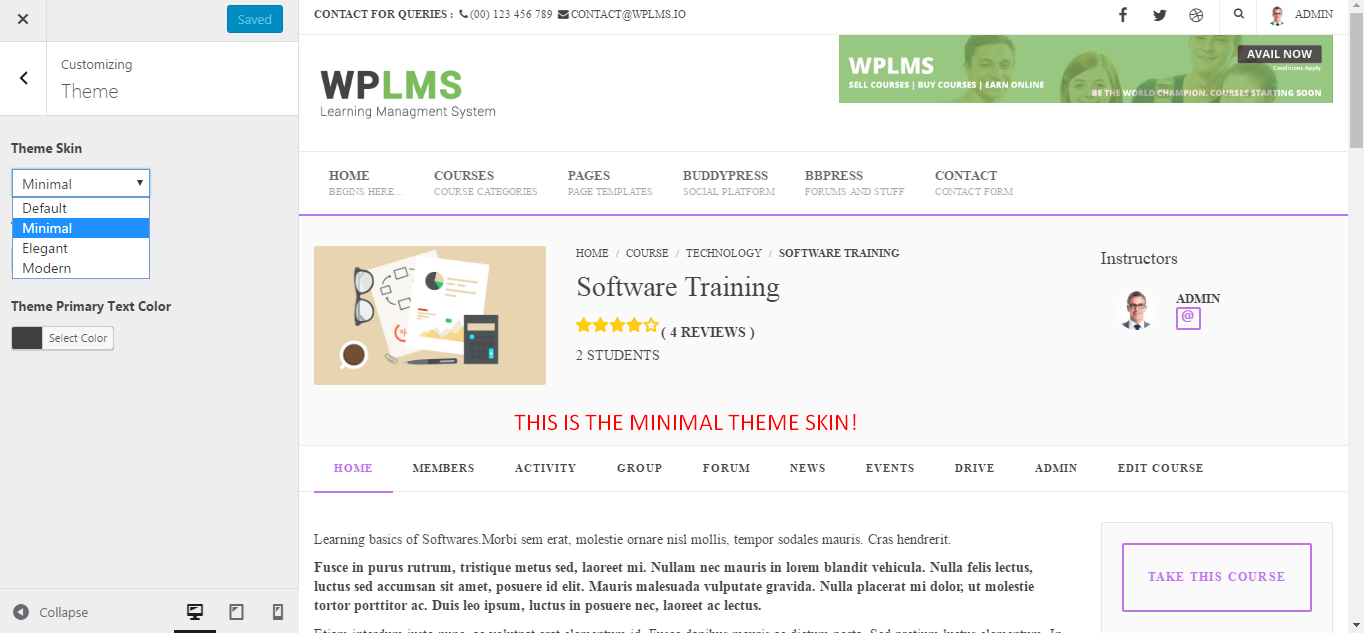
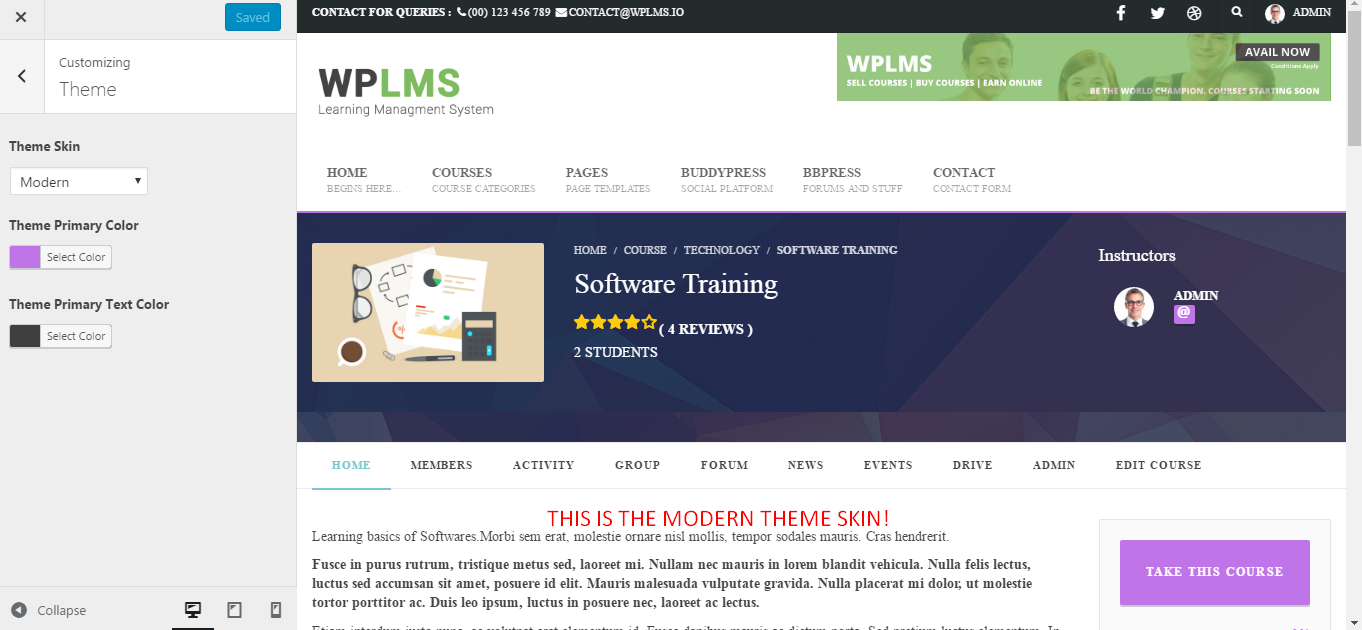
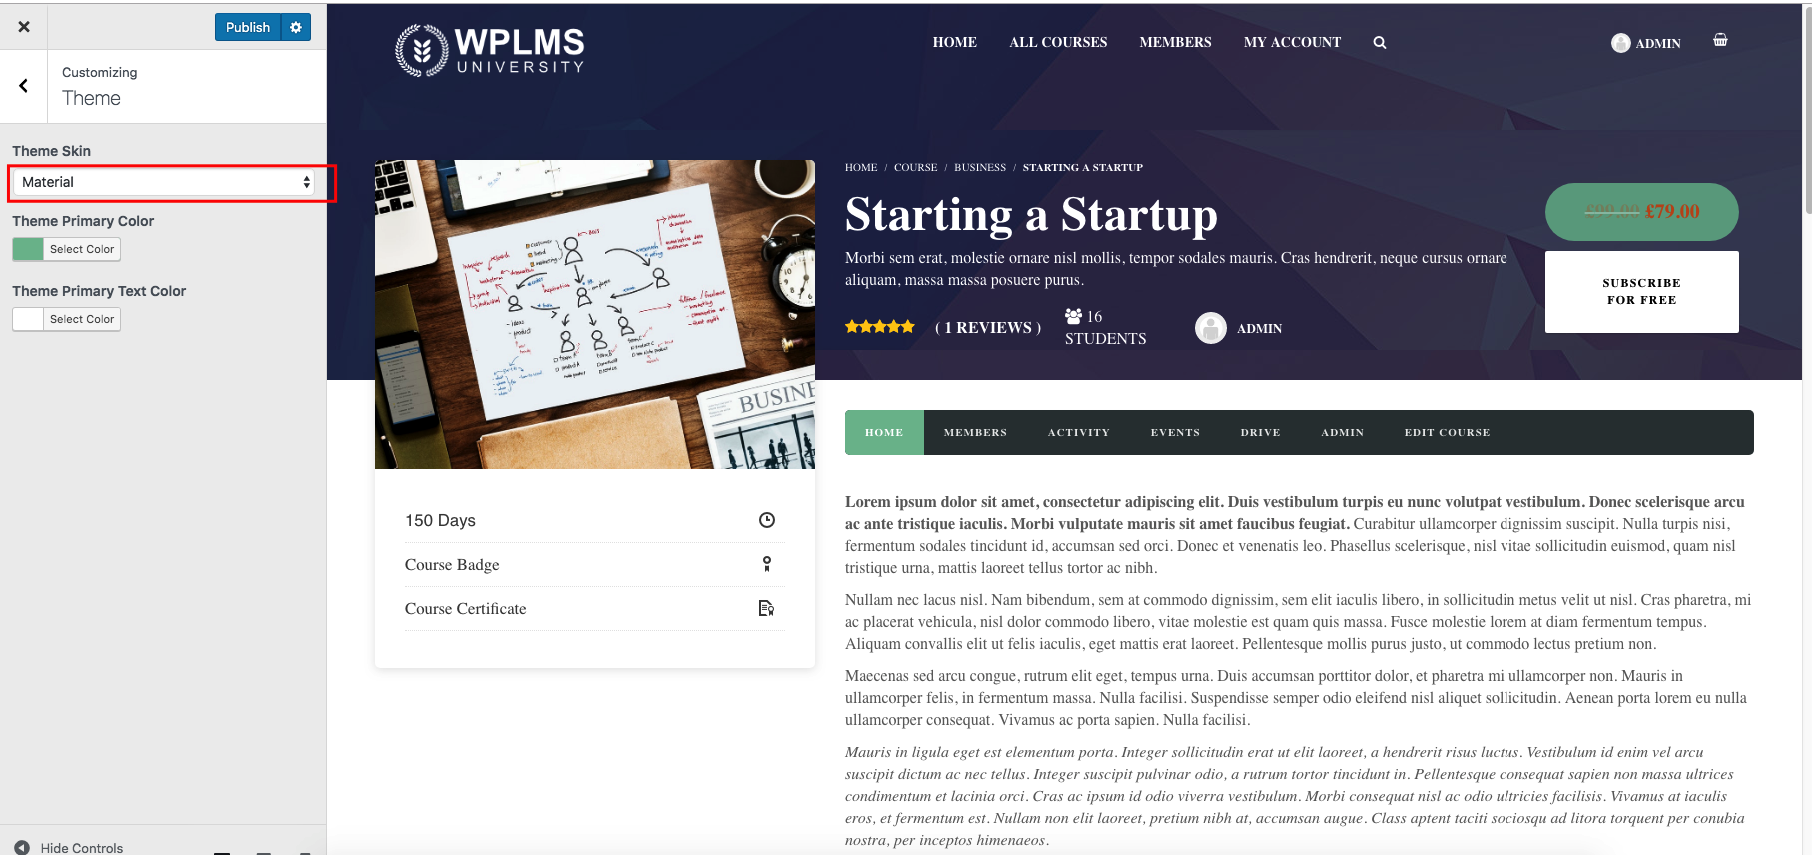
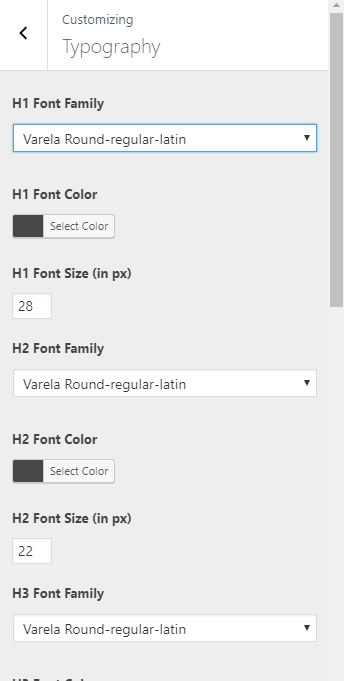
Style
There are 700+ styles combinations which is supported by wplms. To set the theme styles, Go to wp-admin > Appearance > customize. There are 4 types of theme Skin.
- Default
- Modern
- Elegant
- Minimal
- Material

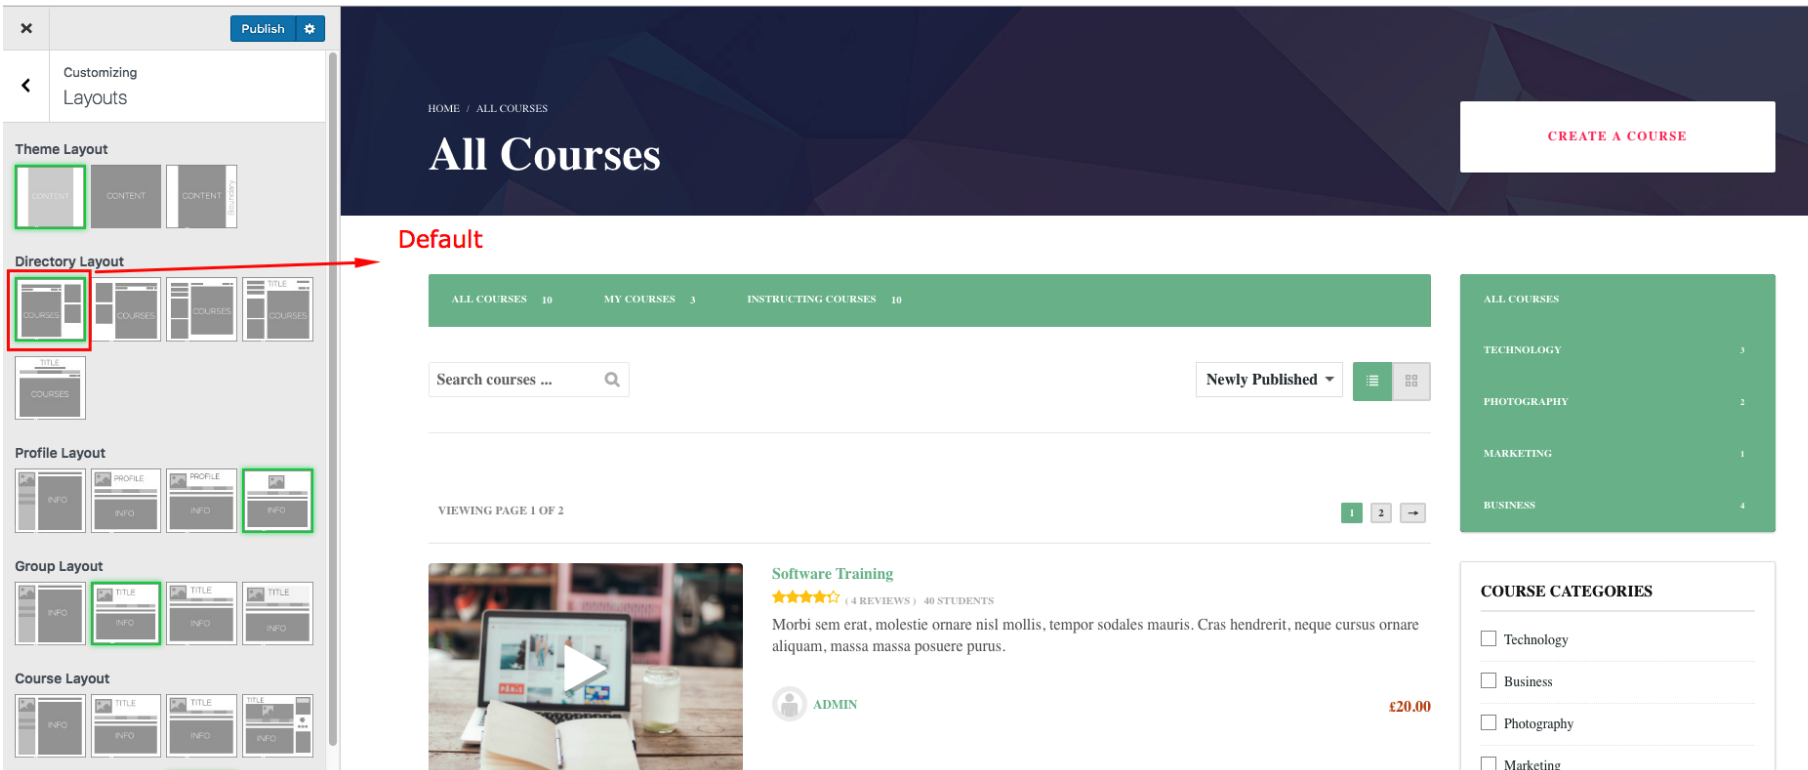
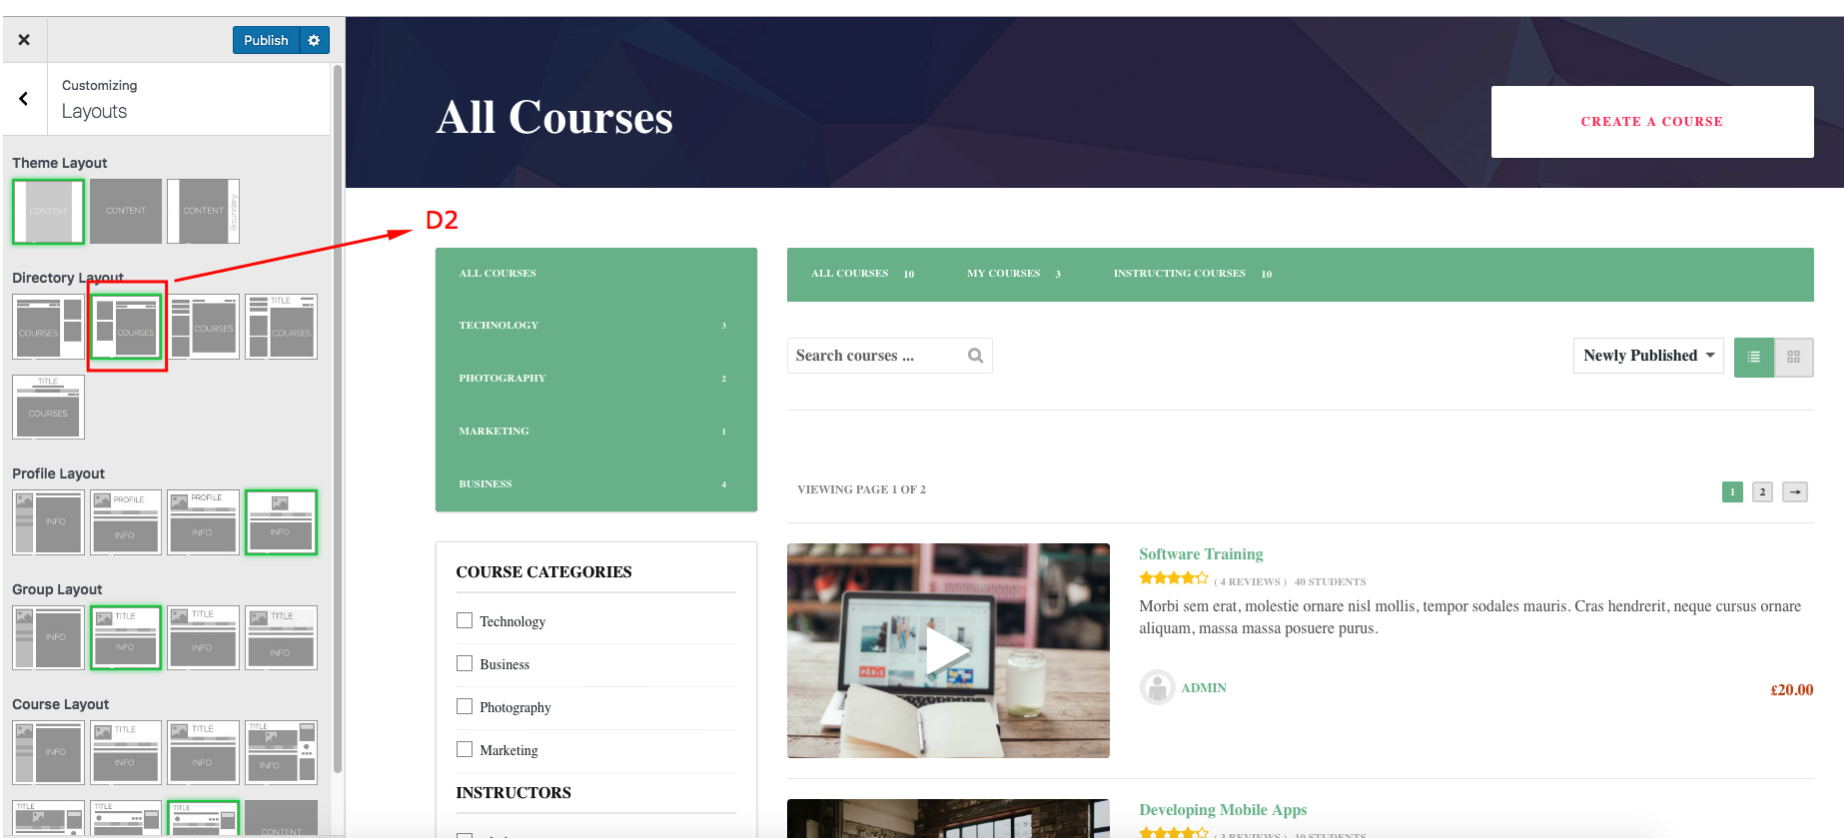
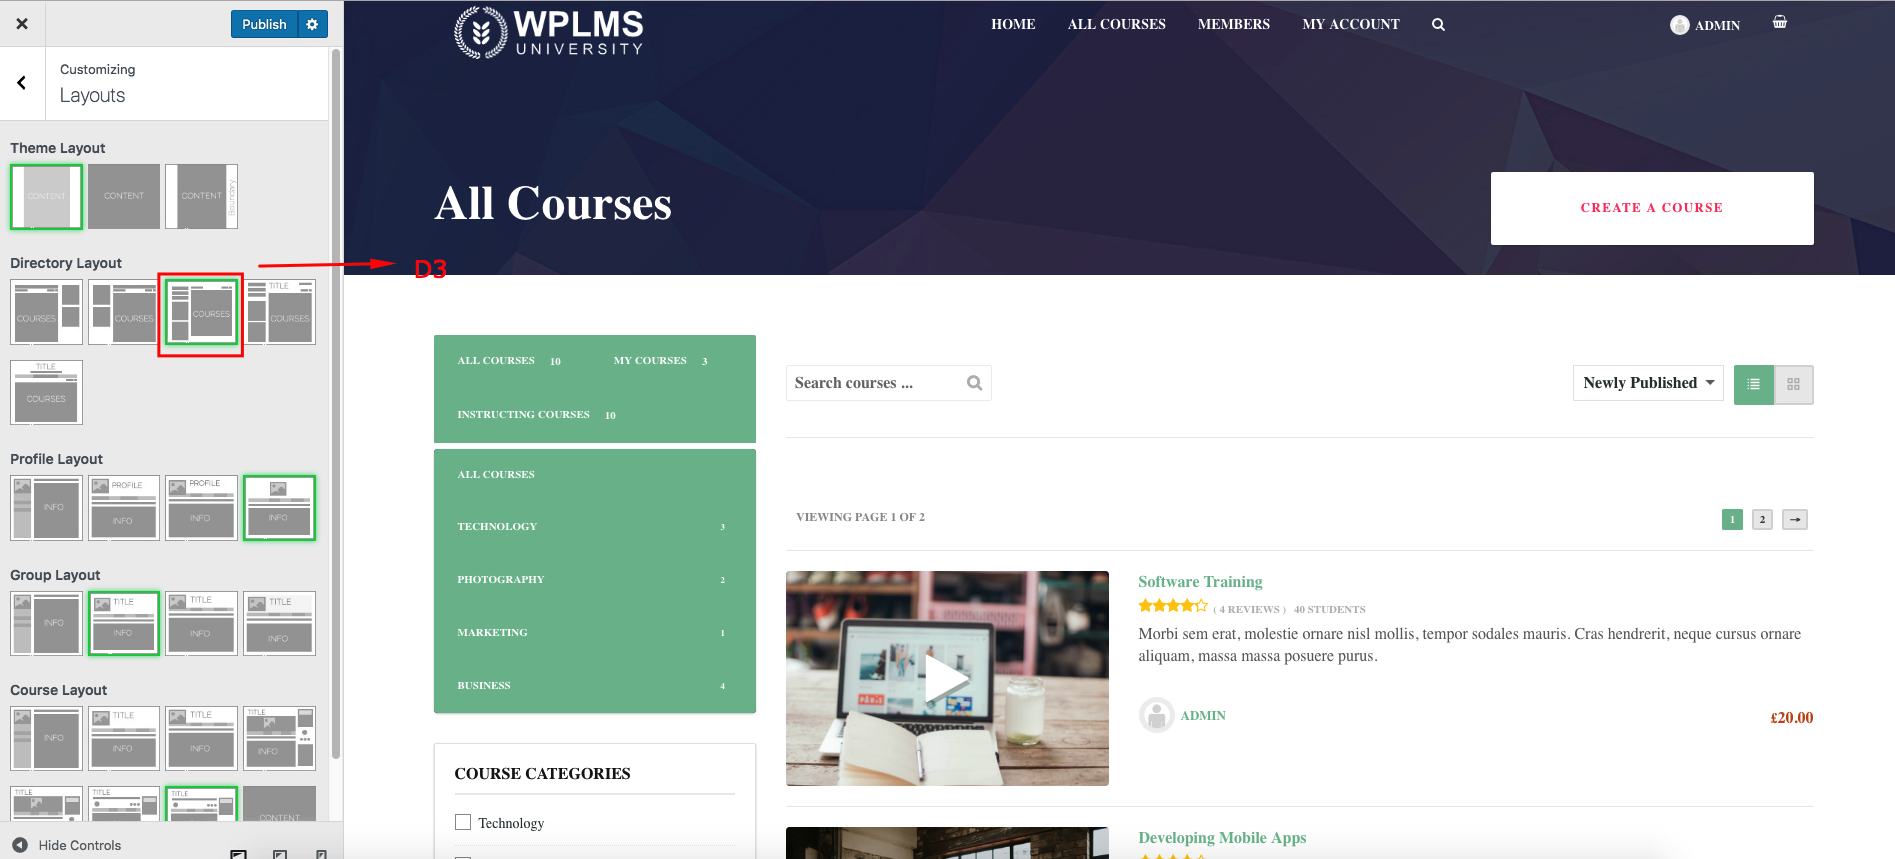
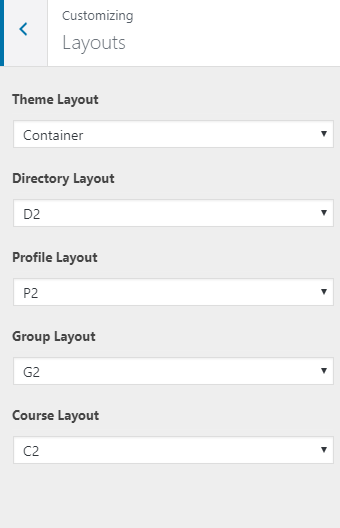
Wplms Supports three types of theme layouts such as Container, fluid, Boxed.
Five Types of directory layout such as default, D2, D3, D4, D5.


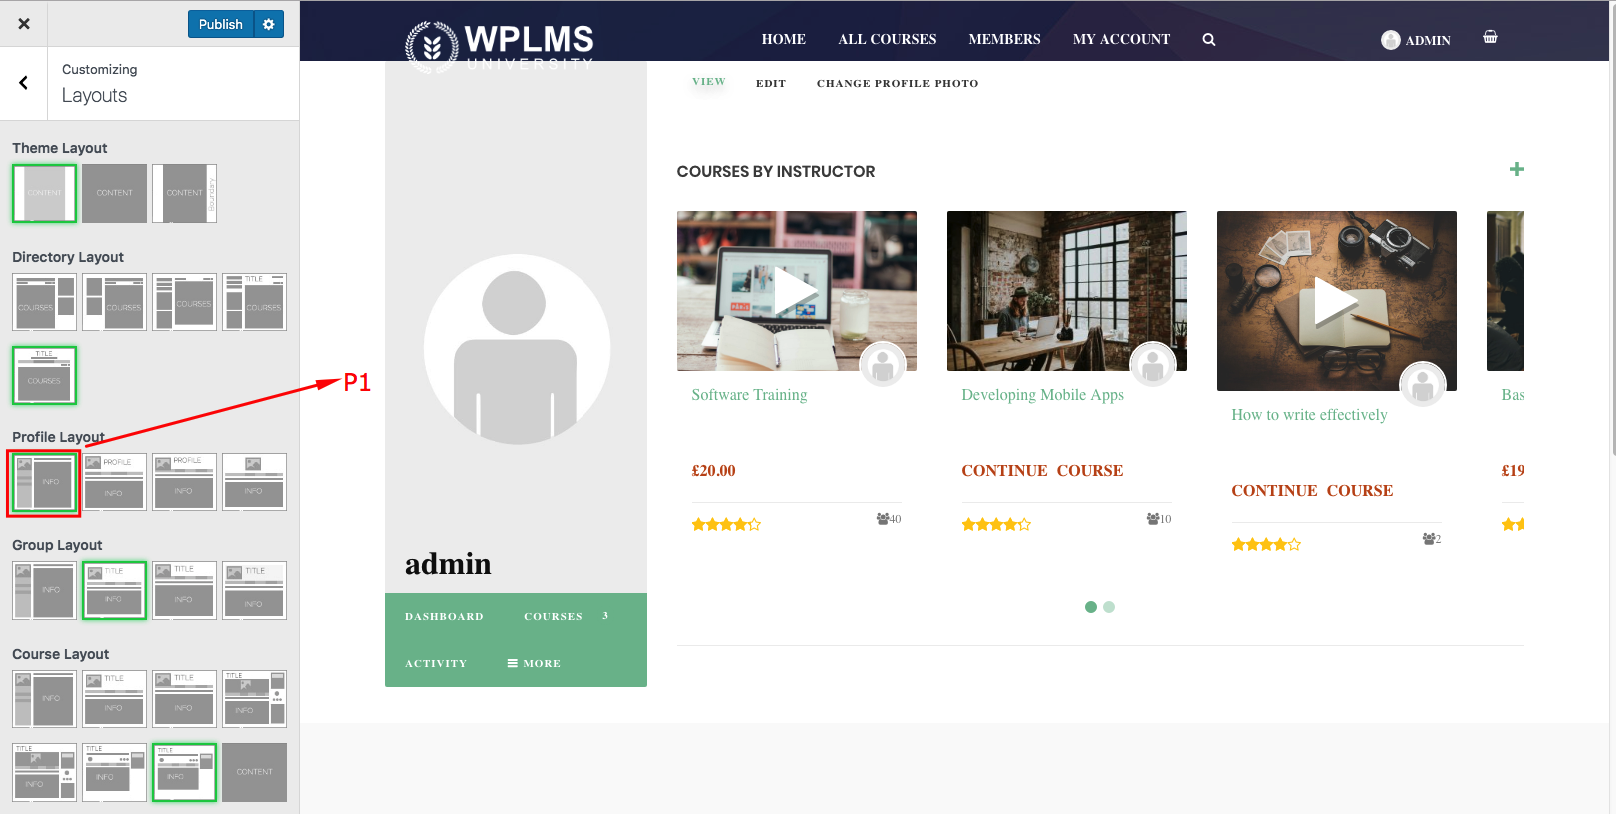
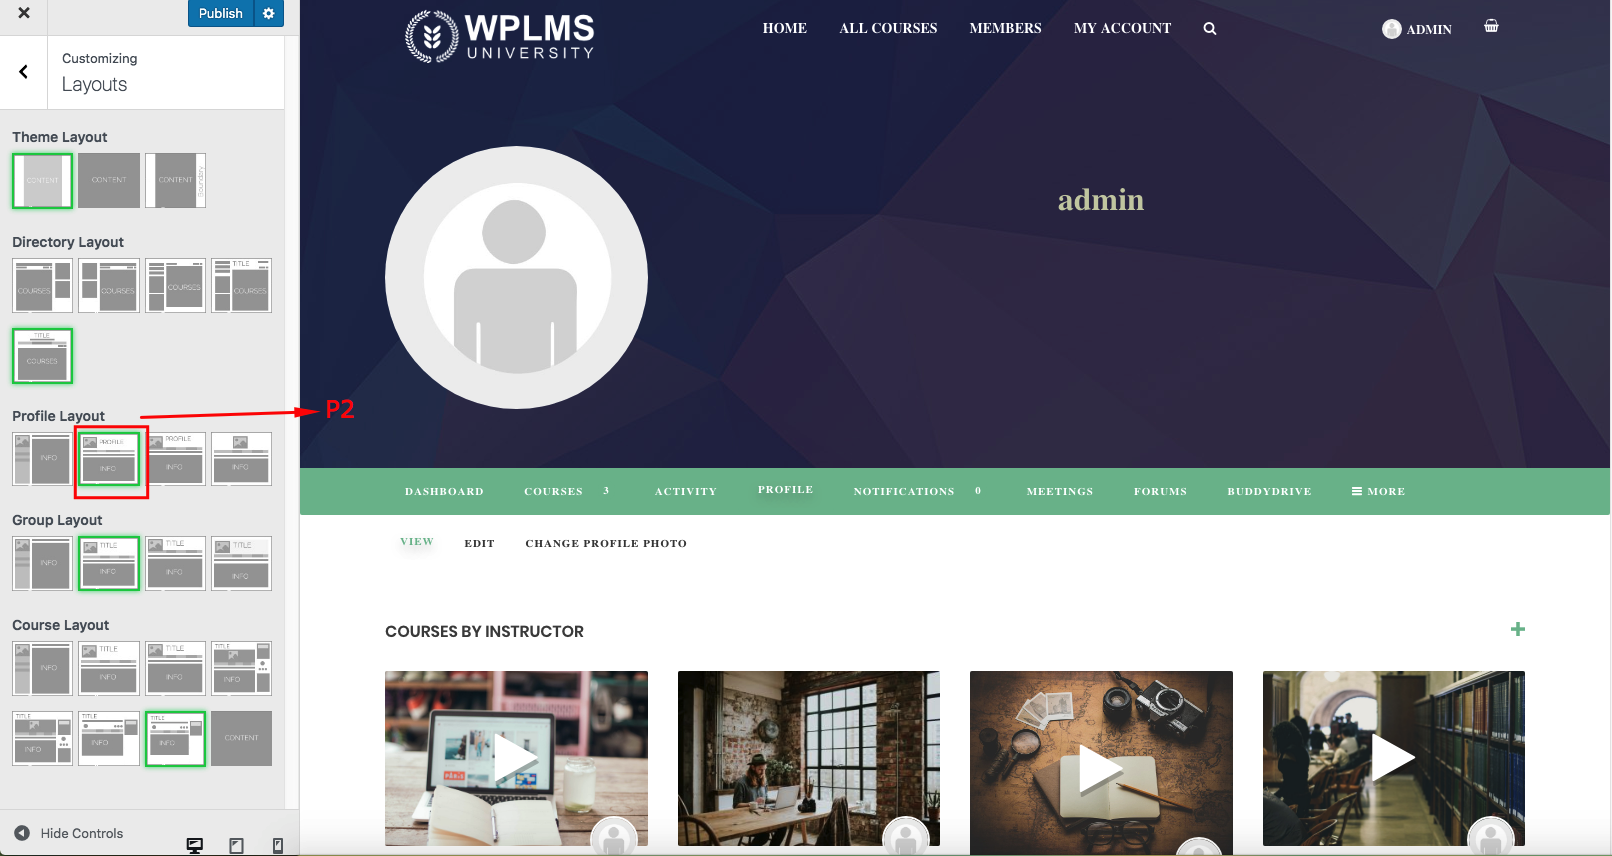
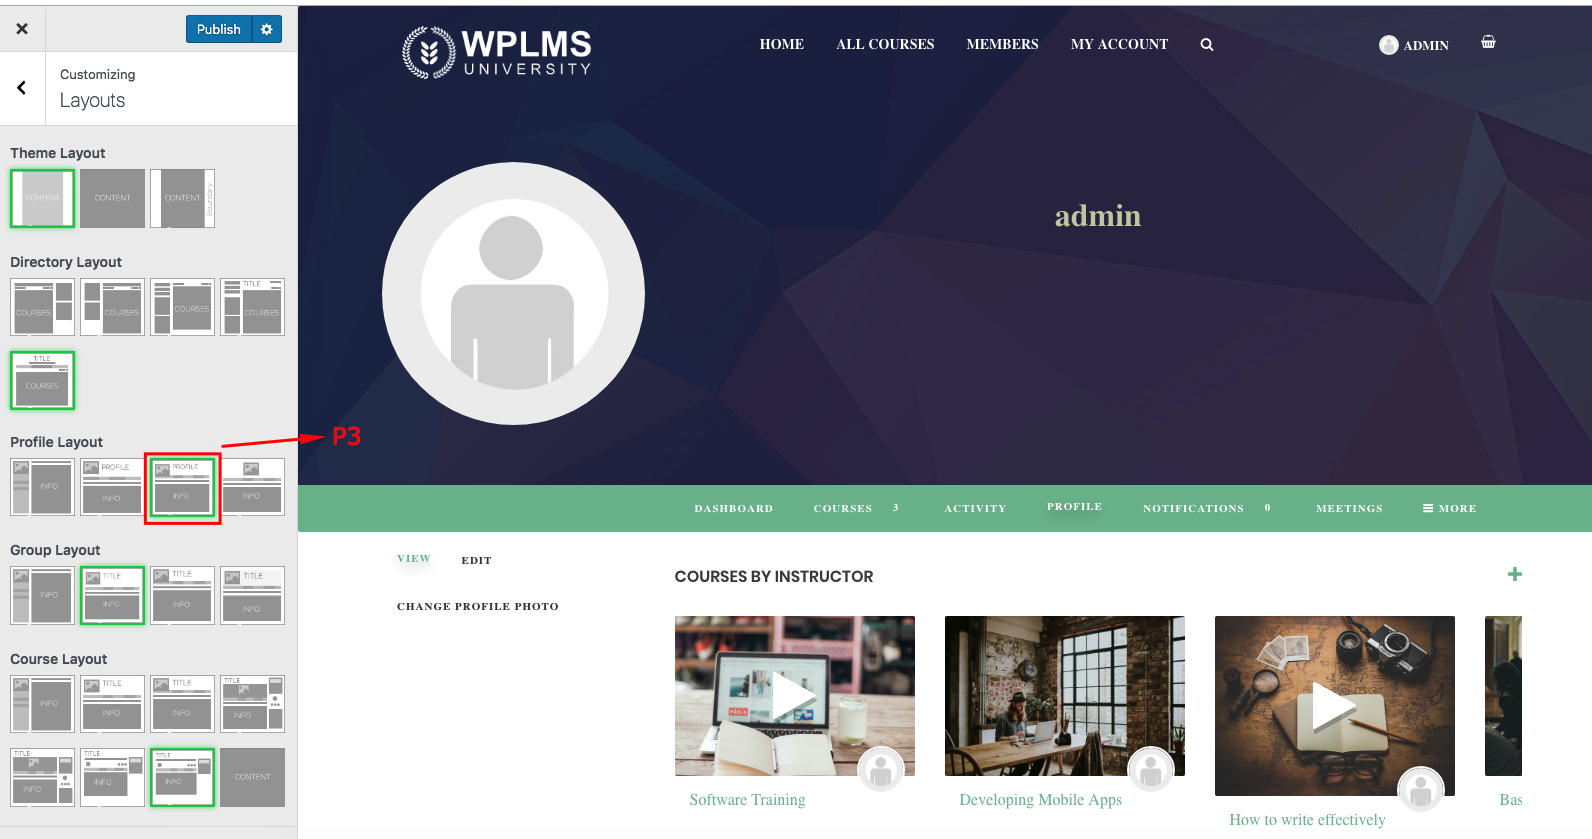
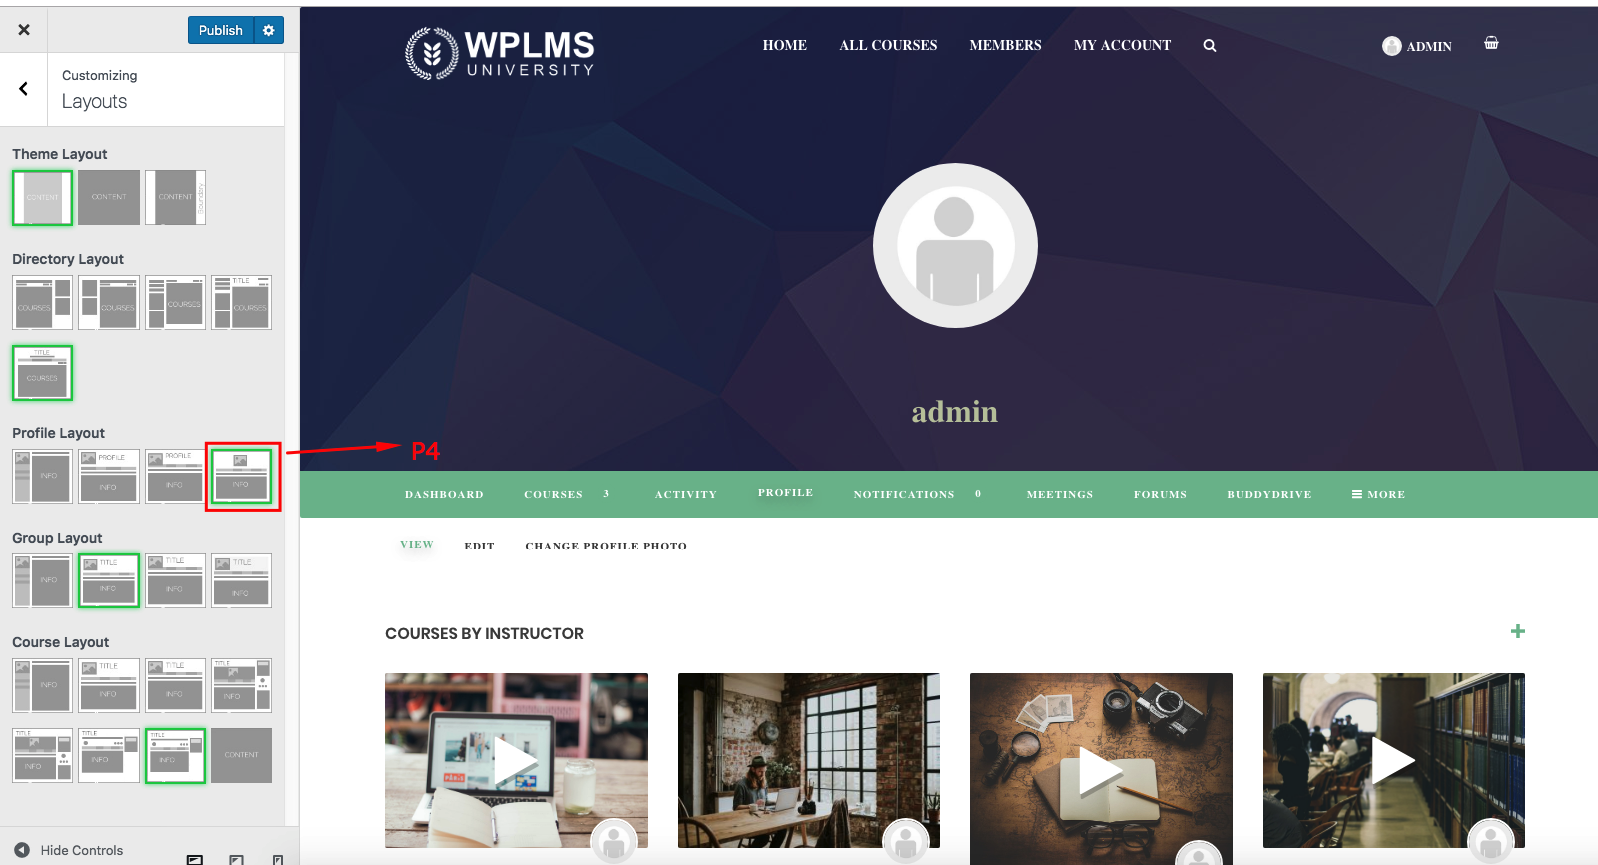
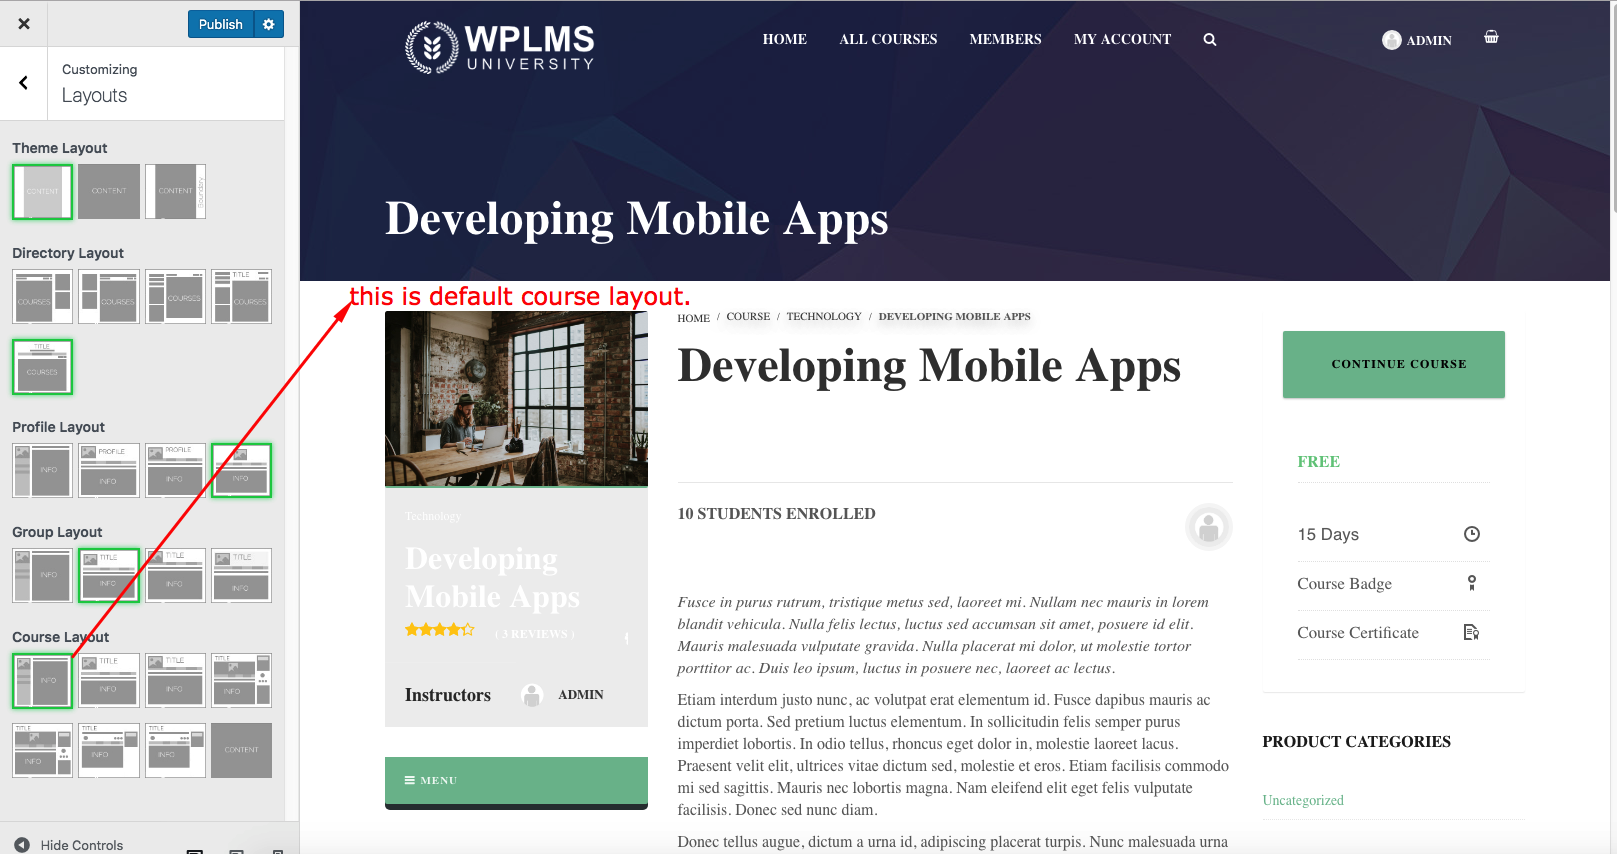
Four Types of Profile layout such as Default, P2, P3, P4.
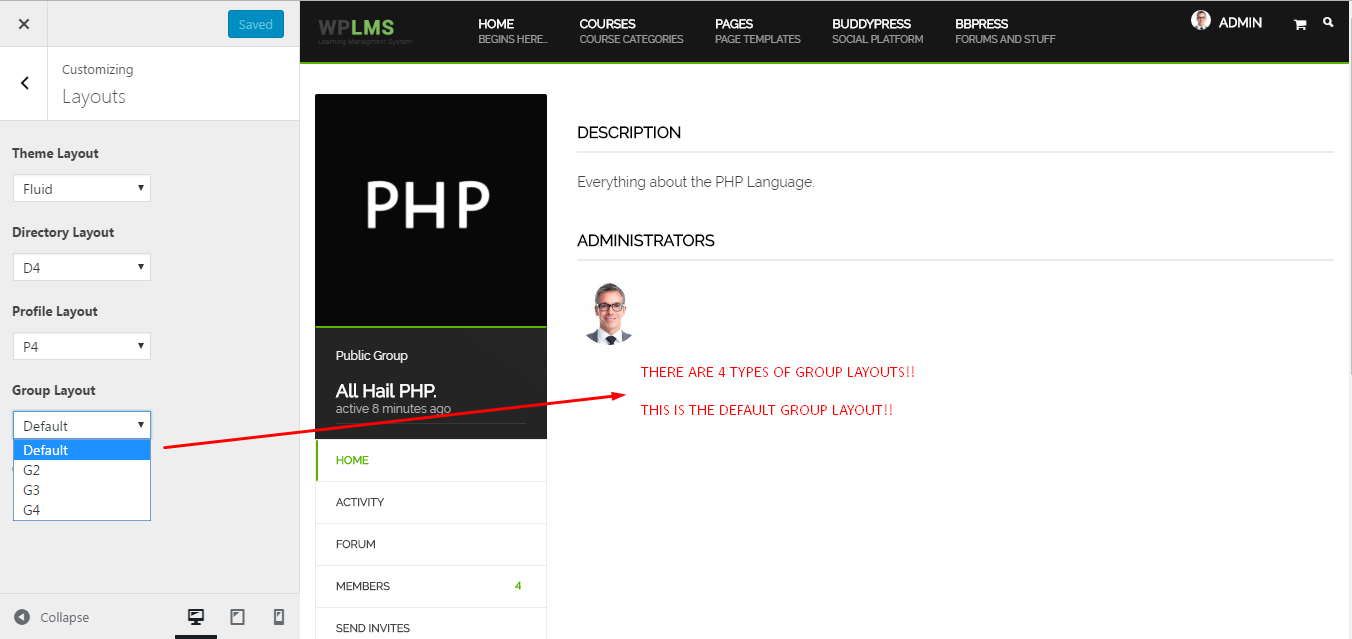
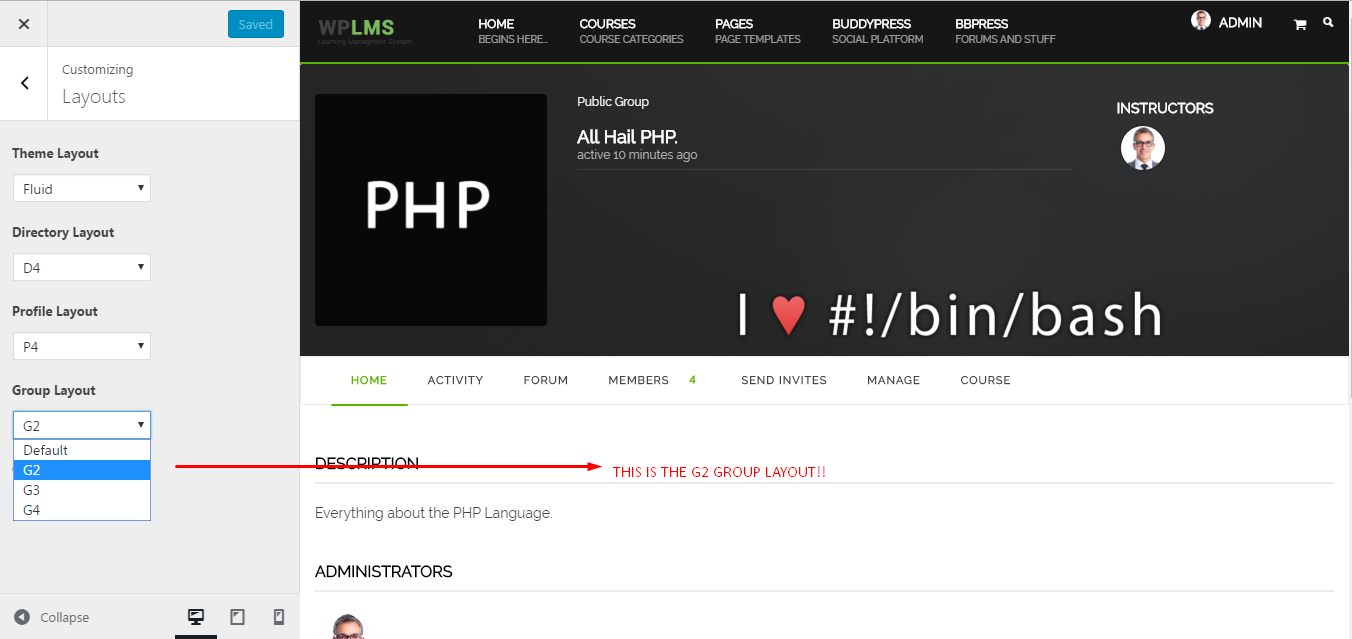
Four types of Group Layout such as Default, G2, G3, G4.
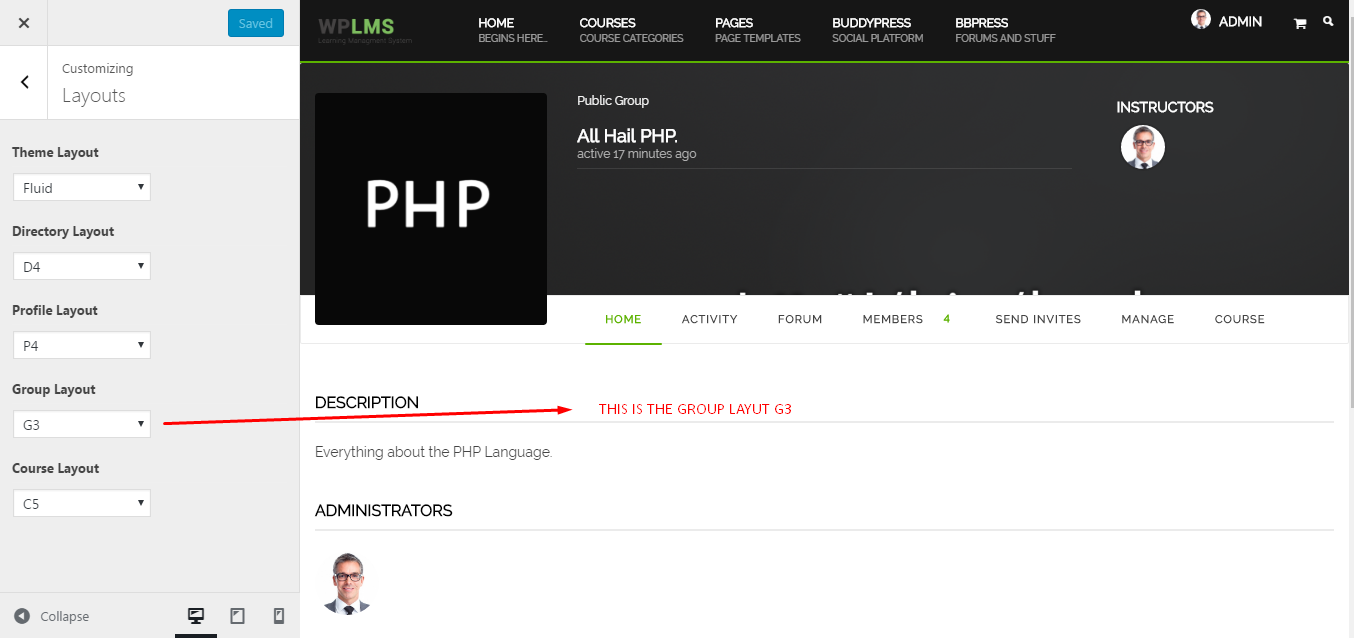
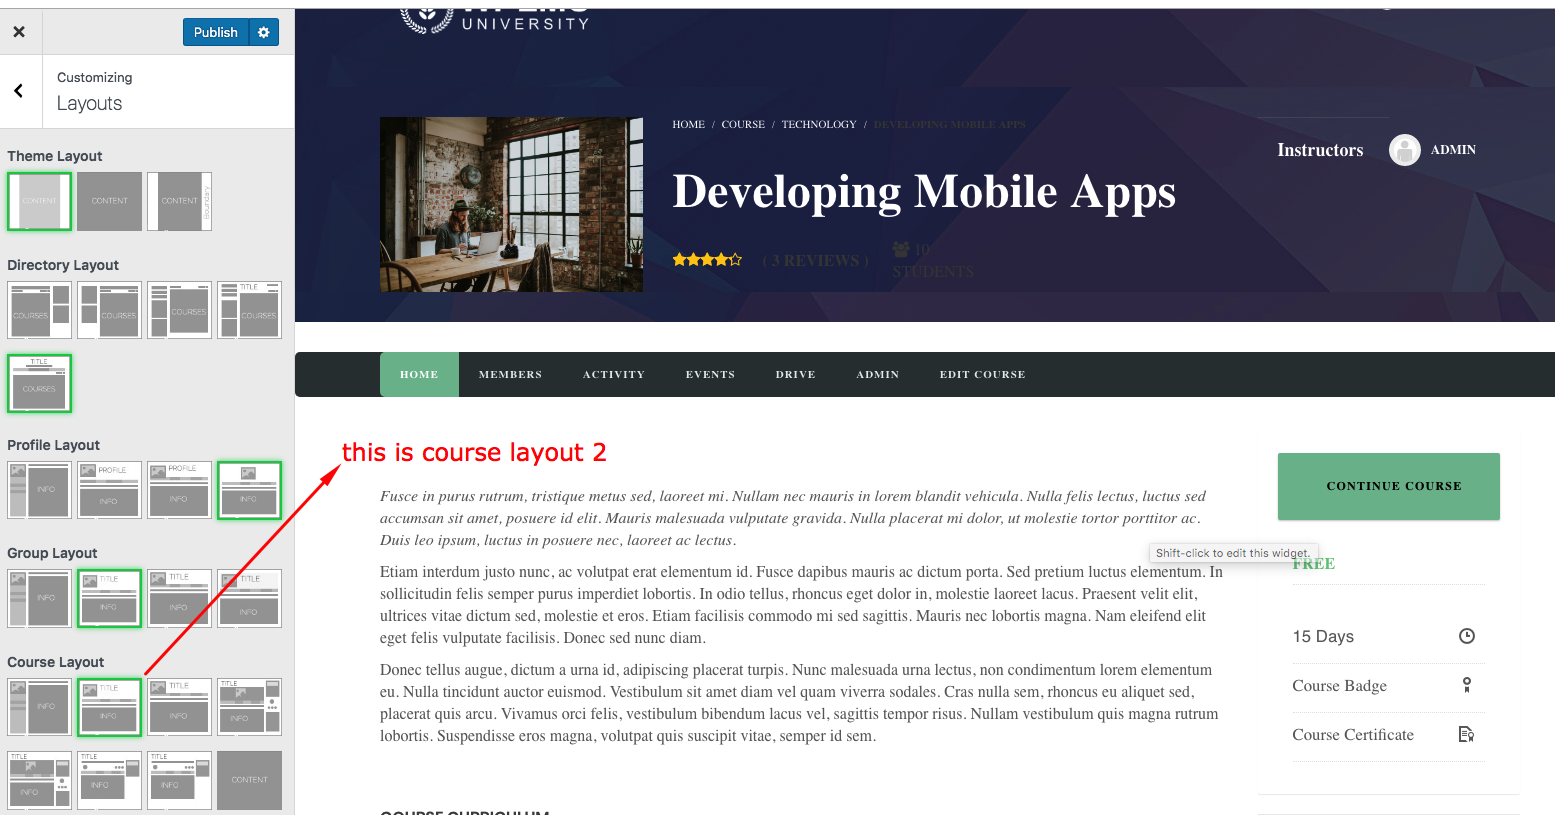
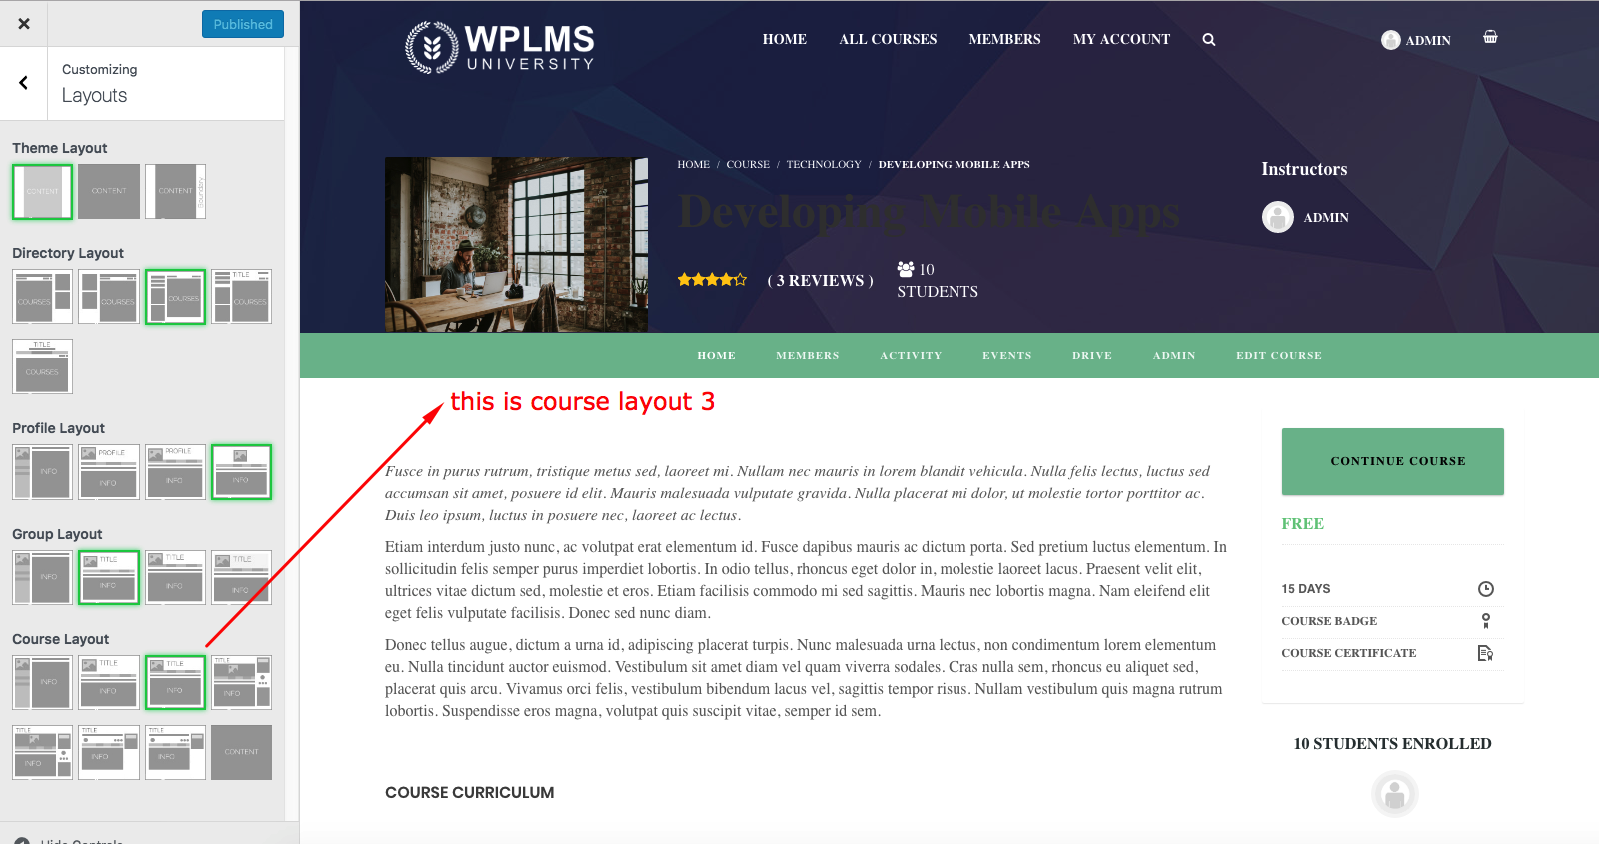
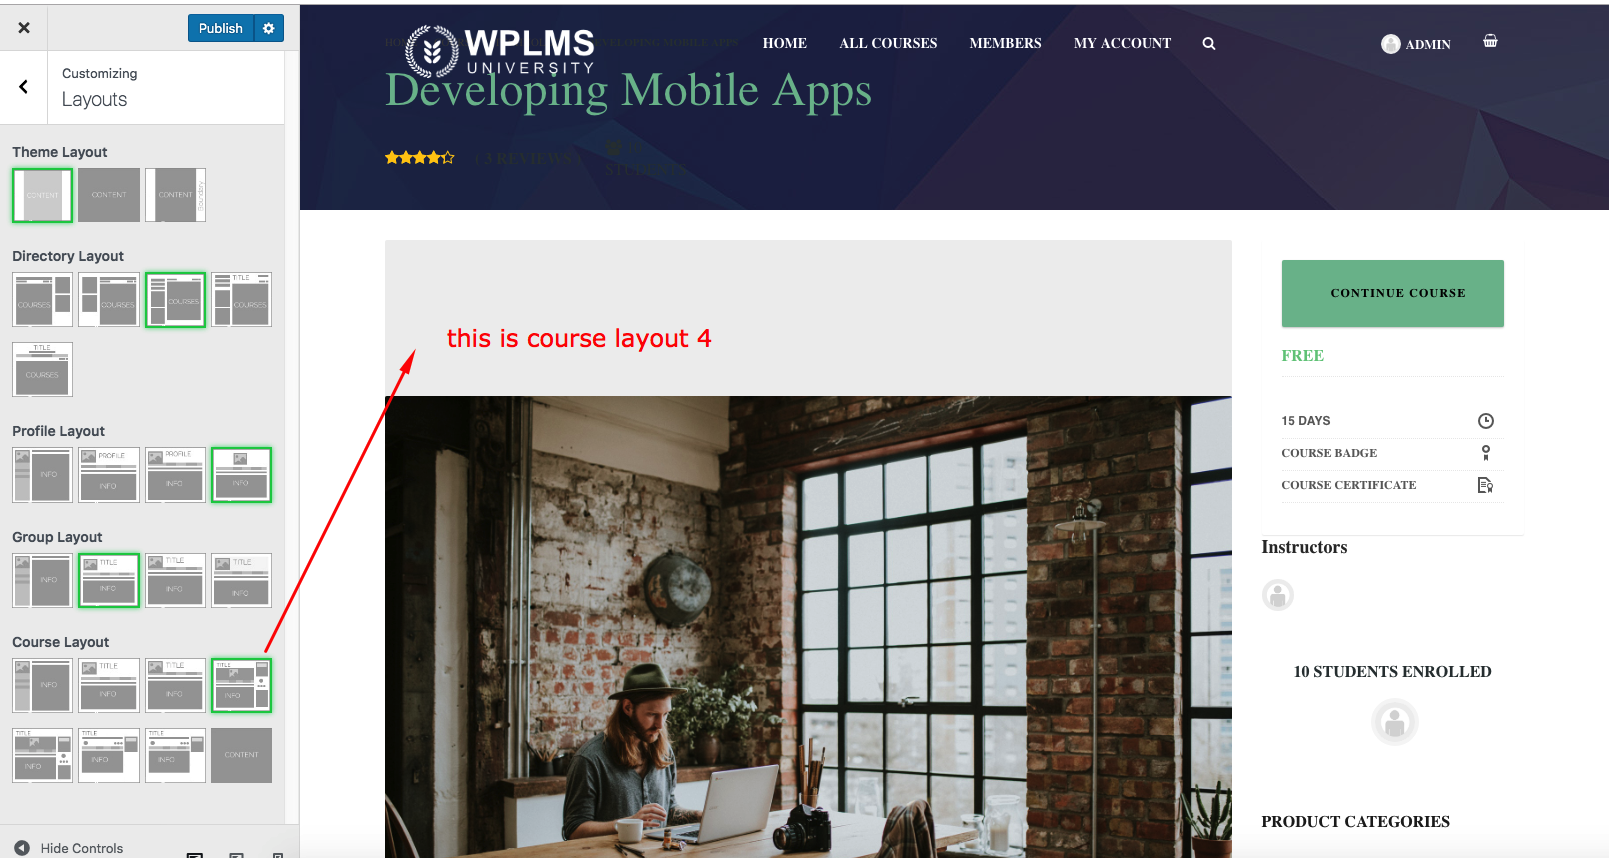
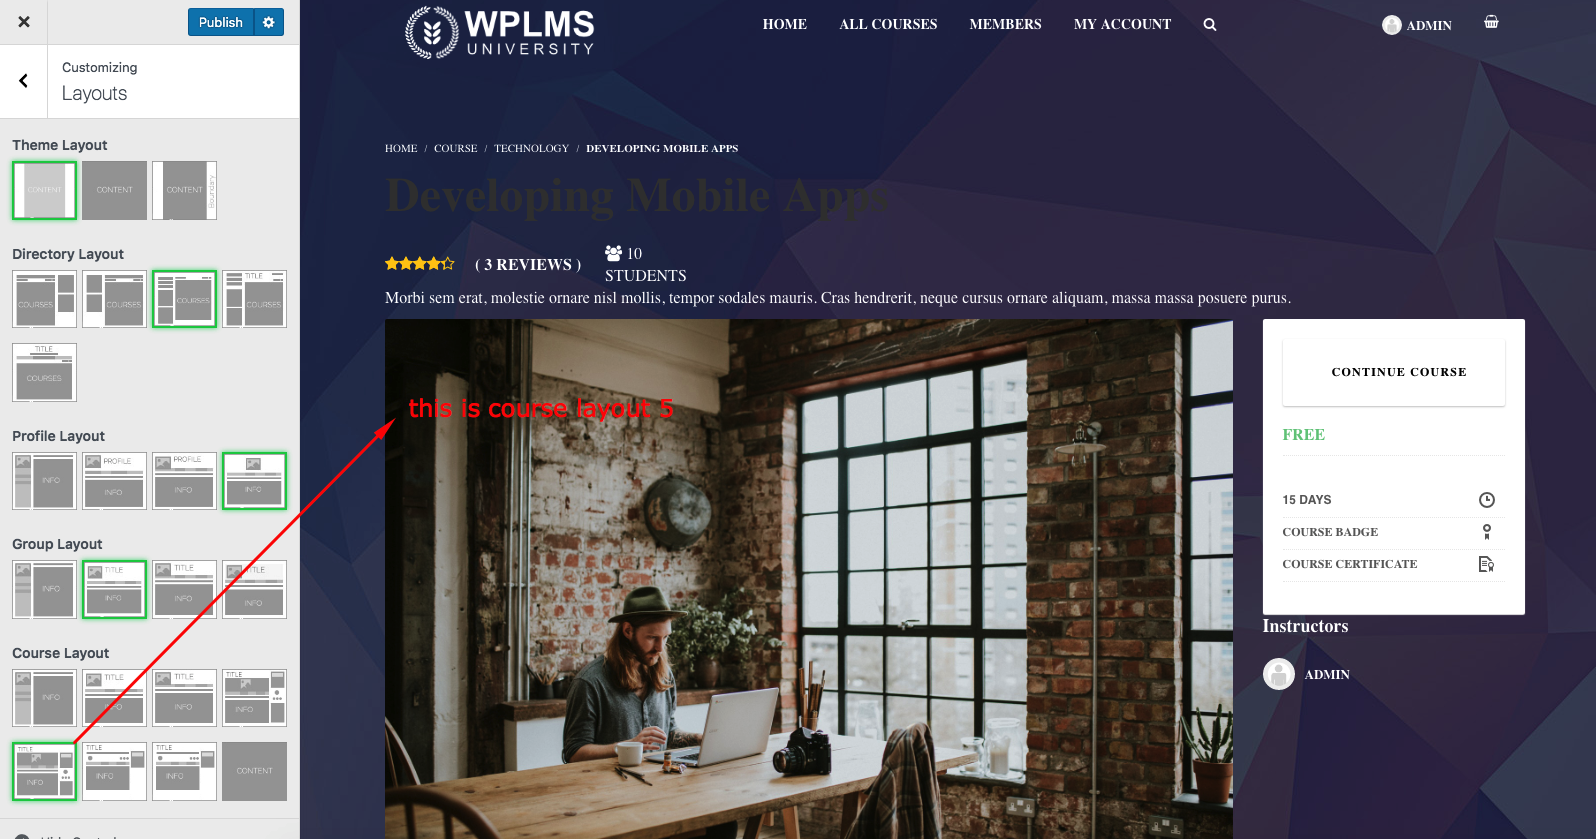
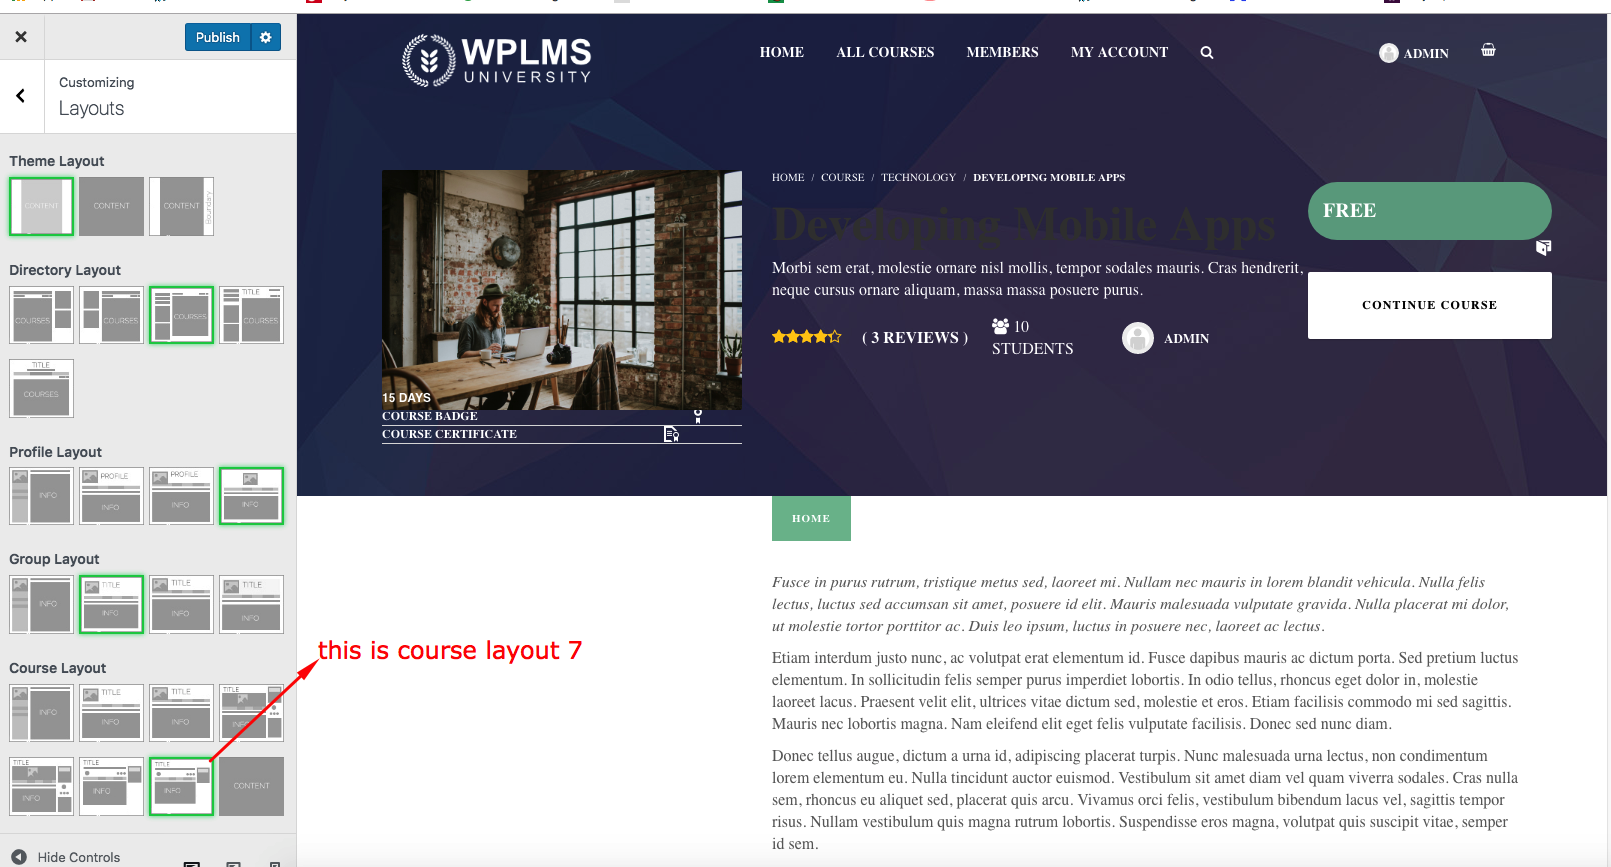
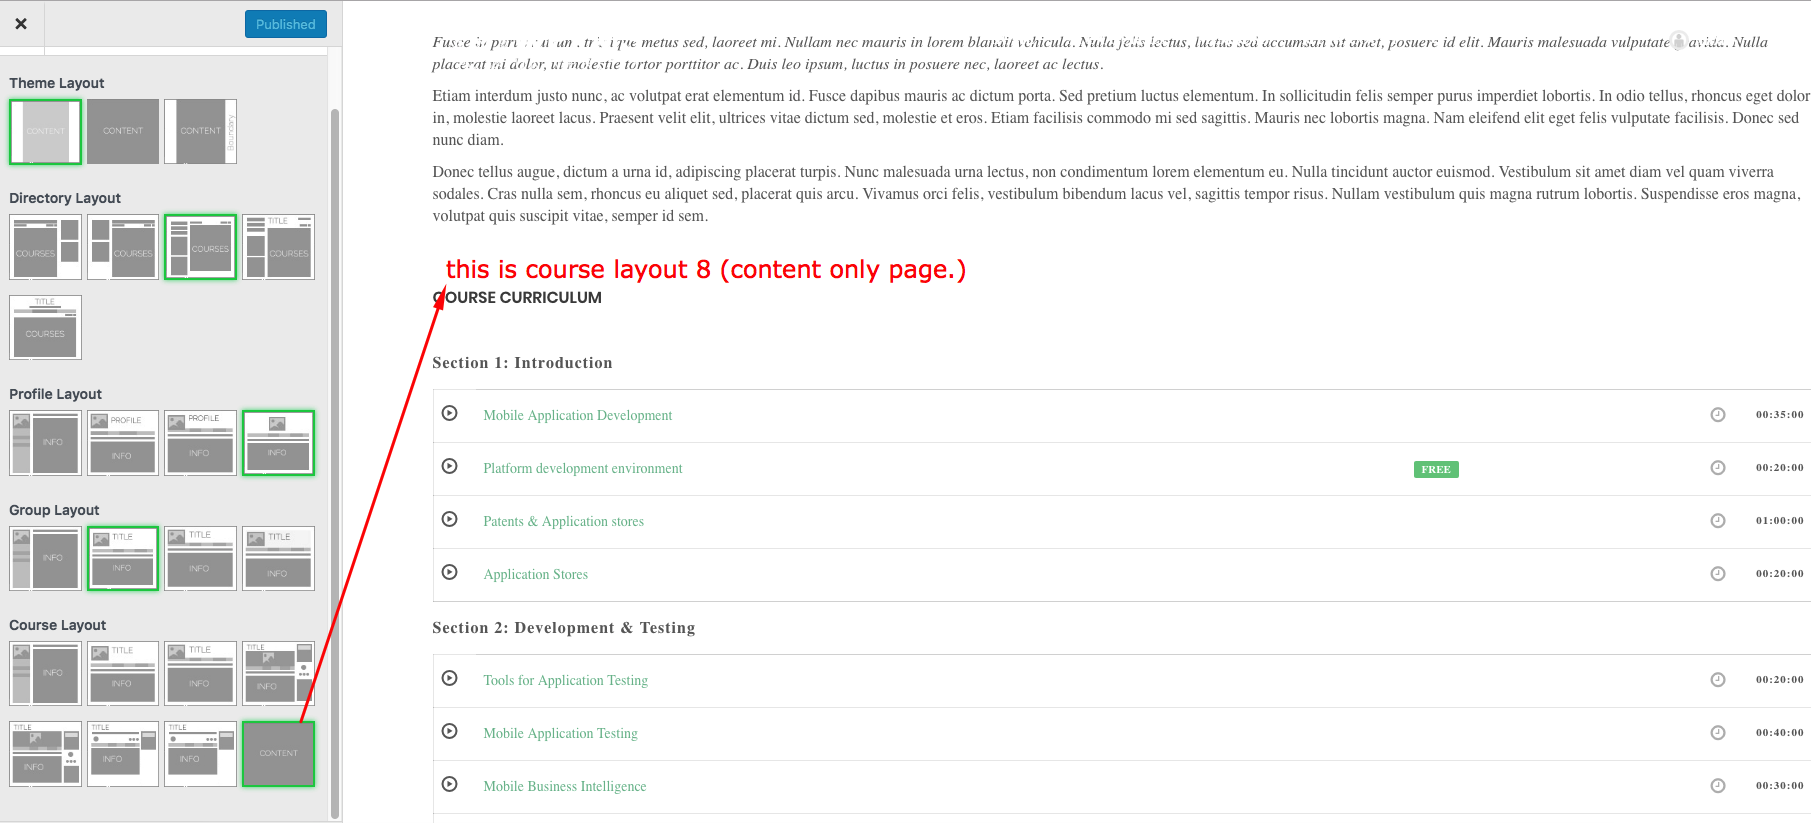
Eight Types of Course Layout such as Default, C2, C3, C4, C5, C6,C7, C8.

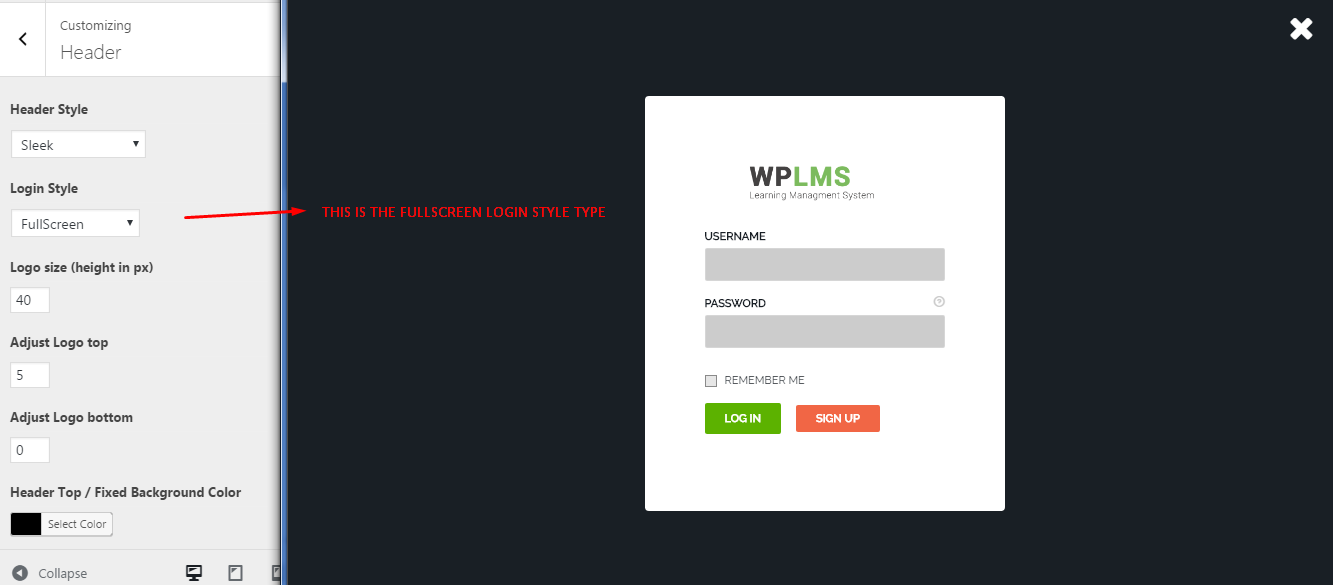
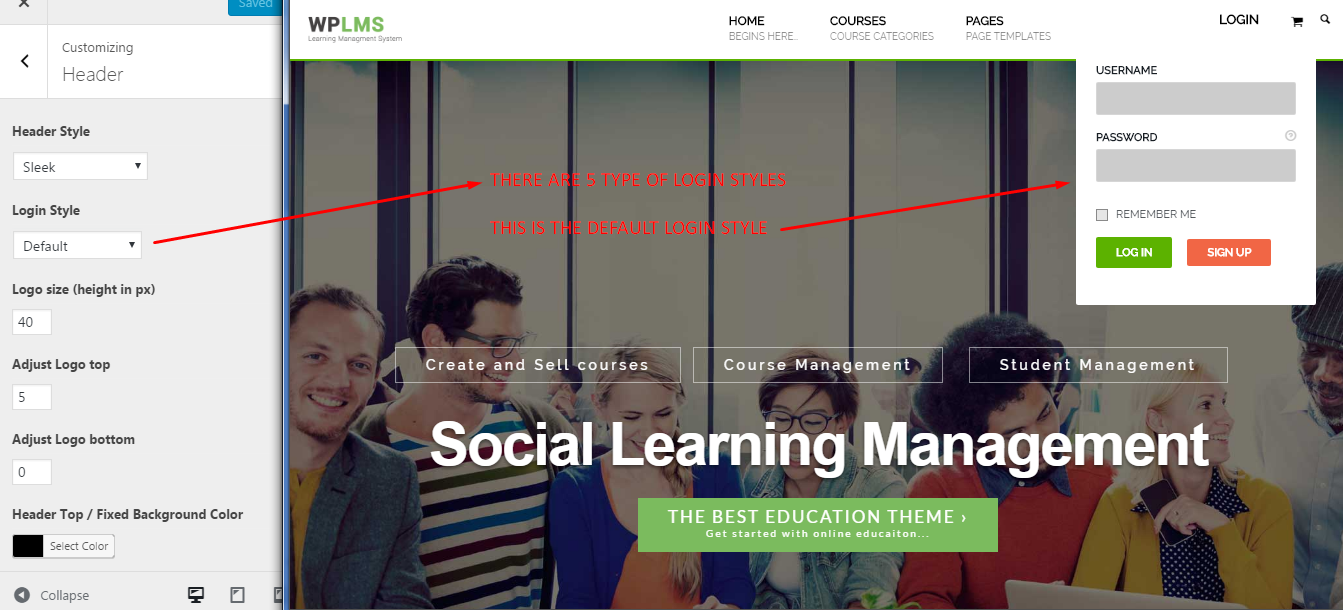
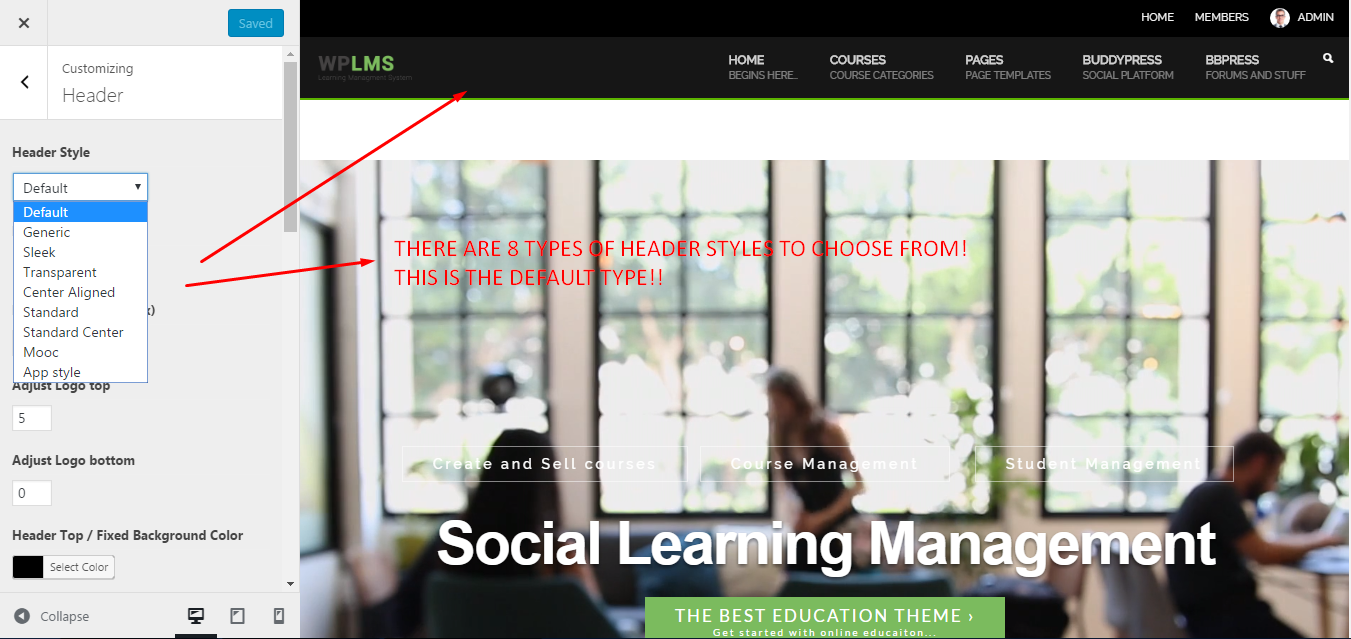
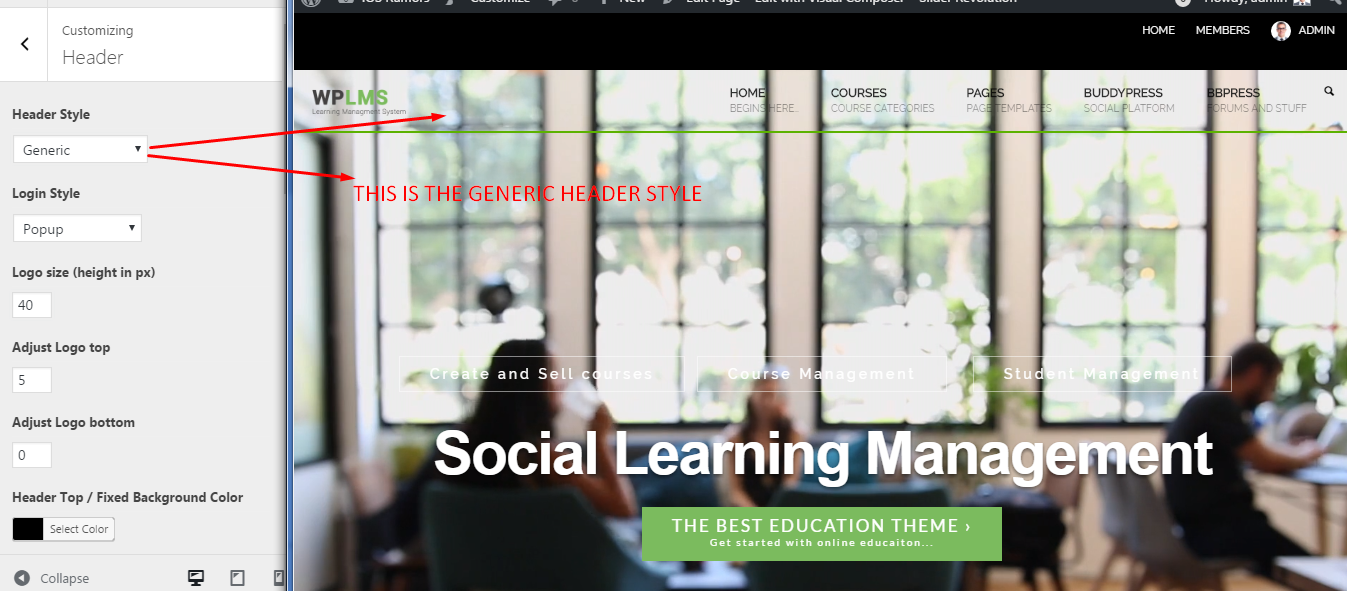
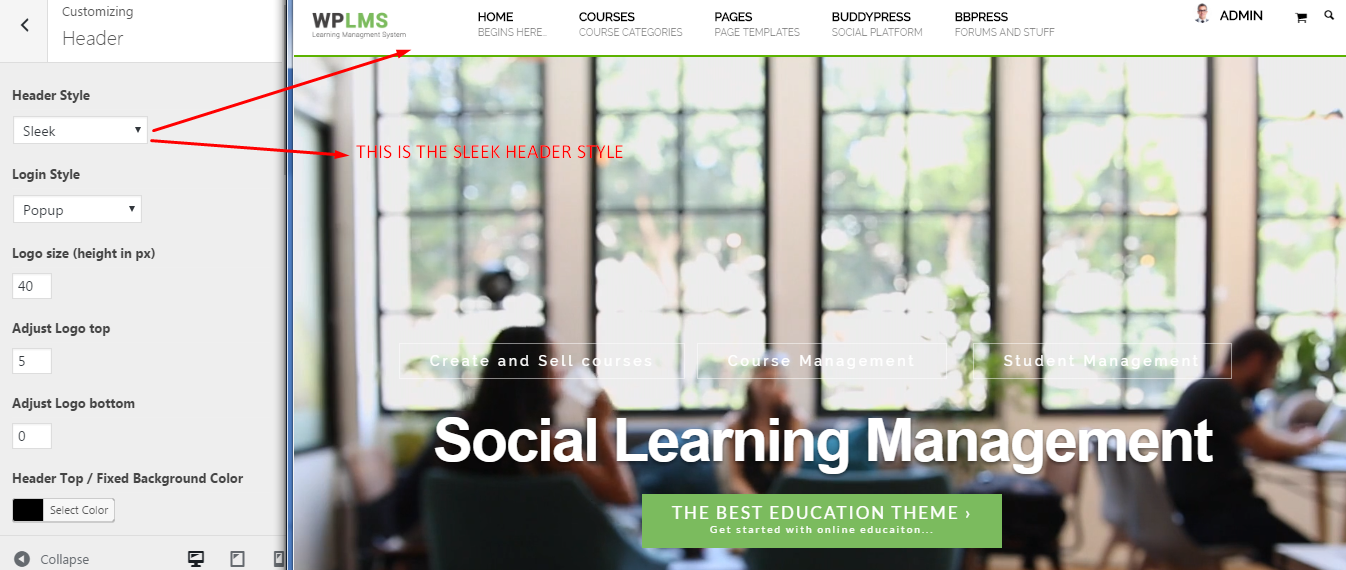
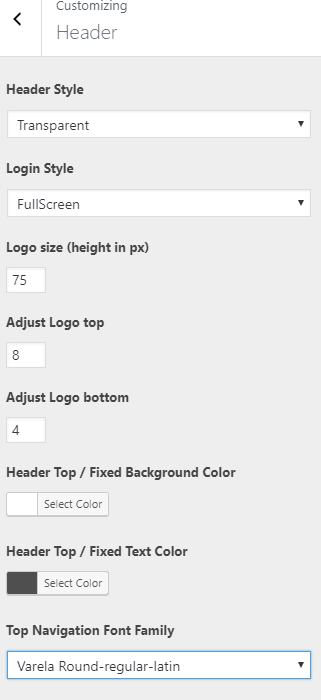
You can also customize Header, Login and Footer styles. There are nine types of header styles available in wplms :
- Default
- Generic
- Sleek
- Transparent
- Center aligned
- Standard
- Standard Center
- MOOC
- App Style
There are five types of Login styles available :
- Default
- full Screen
- Popup
- Big Drop
- Modern
Content
- Media : This will import media files from our demo setups into your wordpress installation. All the media images used in the demos are either open to use or come with extended license, hence you can use them in your site as well. All media which is used in units, course featured images etc. are imported during this. Since, this requires fetching of media items from our demos, it requires a active internet connection. In some cases, it may happen that due to netwrok connection issues or server overload of our site you might not be able to download the media files, in such cases you may be required to re-download the media files Or restart the setup wizard (How to Restart setup wizard). All Media files can be located in WP Admin - Media section.
- Posts : This will import default Posts from our demos. The posts are located in WP Admin - Posts. Learn more about posts
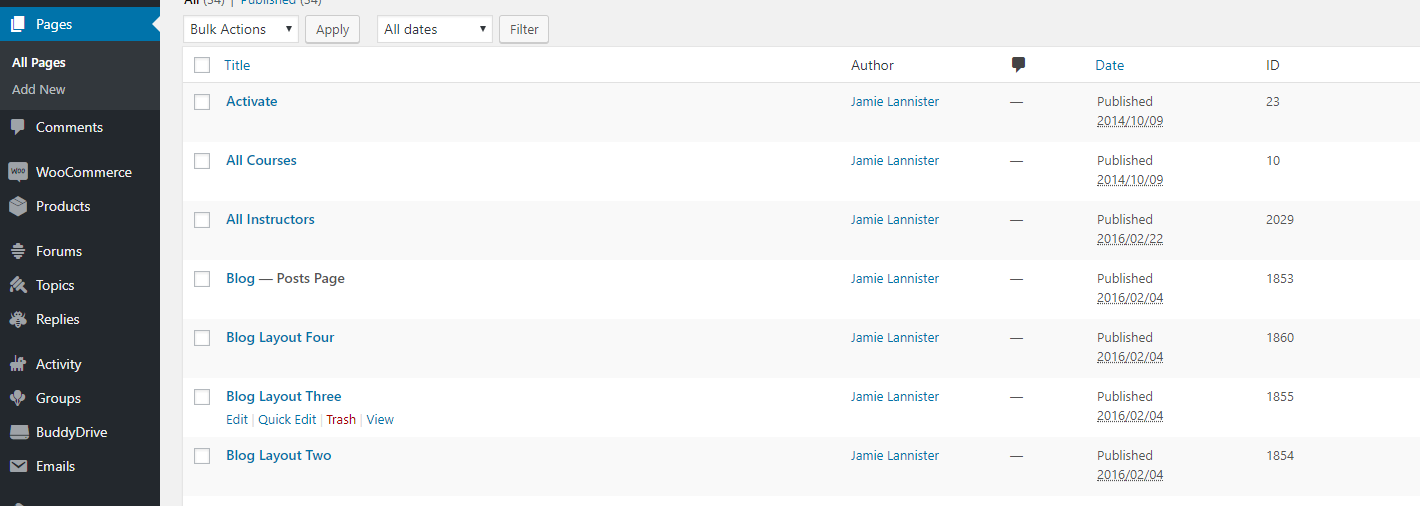
- Pages : This will import default pages from our demos. The pages are located in WP Admin - pages. A page is like a post but it can be used for multiple purposes. You can set any page as your site's home page at WP Admin - Settings - Reading, this configuration is automatically set by the setup wizard.
- Courses : This will import default Courses from our demos. Courses are main entities of WPLMS. A course is usually an individual subject. Students may receive a grade and academic credit after completion of the course. A course is a unit of teaching that typically lasts one academic term, is led by one or more instructors (teachers or professors). Using WPLMS Theme you can create offline as well as online courses. The courses are located in WP-Admin > LMS > All Courses.
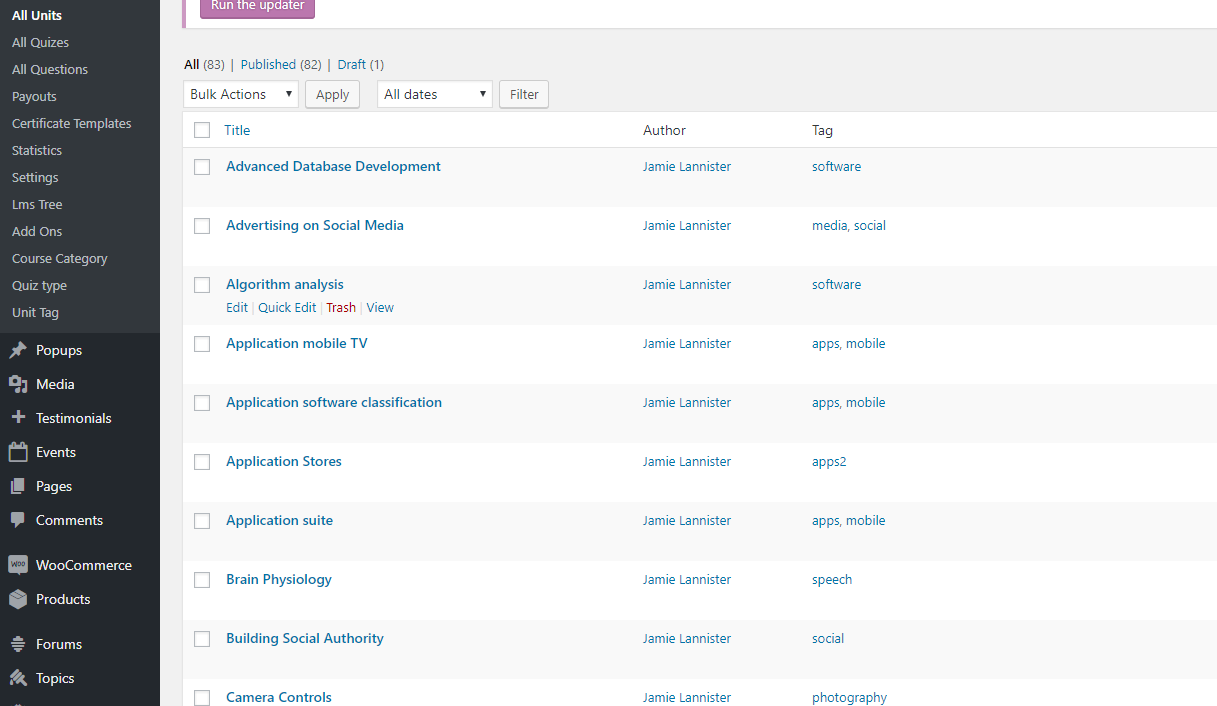
- Units : This will import default Units from our demos. Unit is an entity of course. Unit is a general measure of academic work over a period of time, typically a term ( or semester). The units are located in WP-Admin > LMS > All Units.
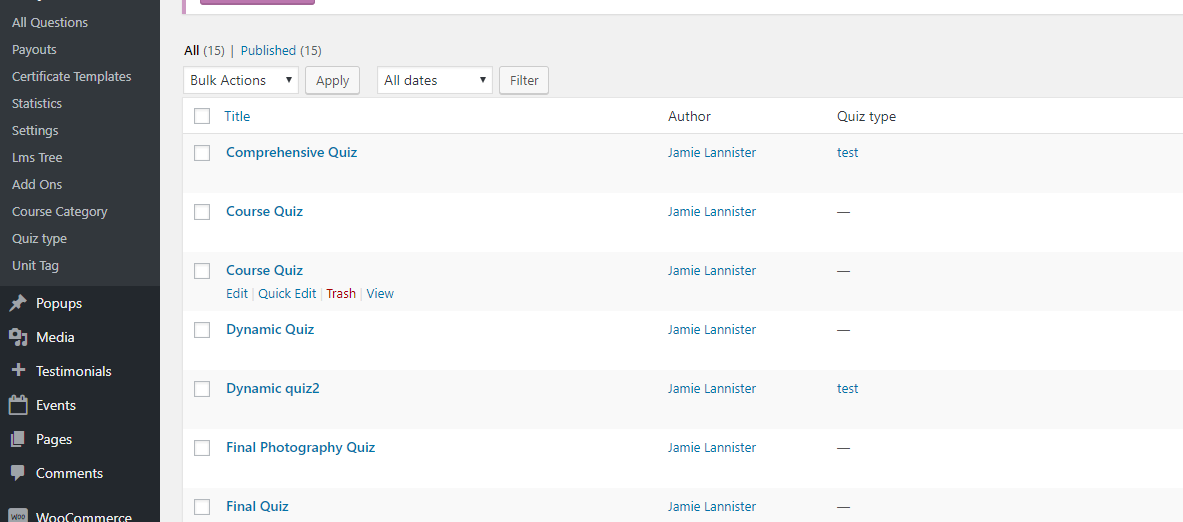
- Quizzes : This will import default Quizzes from our demos. A quiz is a brief assessment used in education and similar fields to measure growth in knowledge, abilities, and/or skills. Quizzes are usually scored in points. In wplms, an instructor can create quizzes and attach those quizzes for the assessment of those students who are enrolled in that course. The quizzes are located in WP-Admin > LMS >All Quizzes.
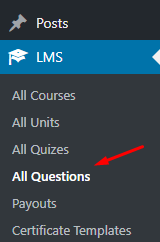
- Question Bank : This will import default Questions from our demos. Question banks is a library containing hundreds of questions. The questions are located in WP-Admin > LMS > All Questions.
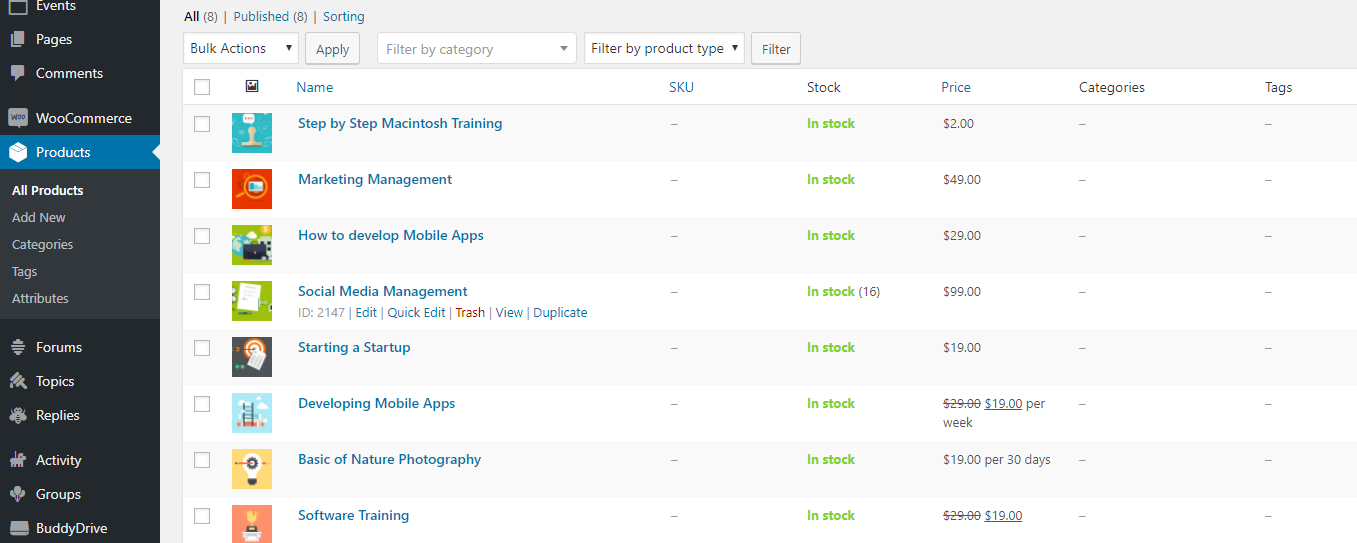
- Products : This will import default Products from our demos. The Products are located in WP-Admin > Products > All products. Adding and Managing Products
-
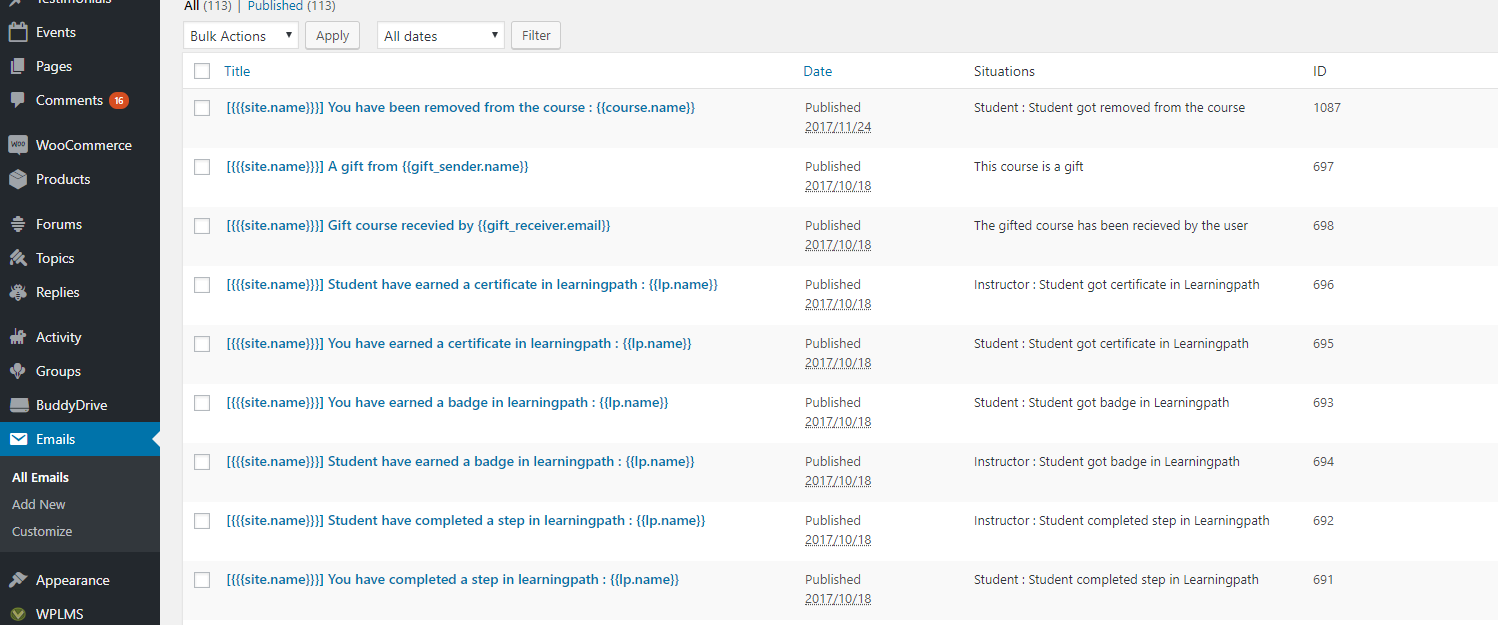
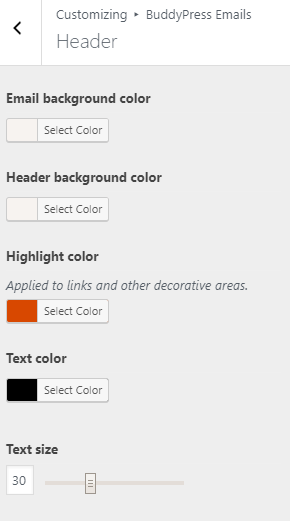
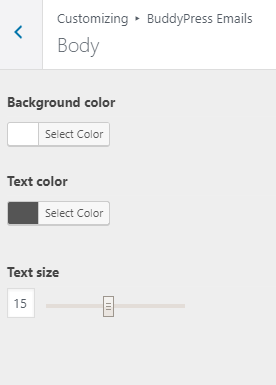
Buddypress Emails : This will import default Buddypress Emails from our demos. Every Email is assosciated with a situation. Whenever an action is triggered its associated email template send by system. The Emails are located in WP-Admin > Emails > All Emails. You can customize your buddypress emails template from WP-Admin > Emails > Customize.
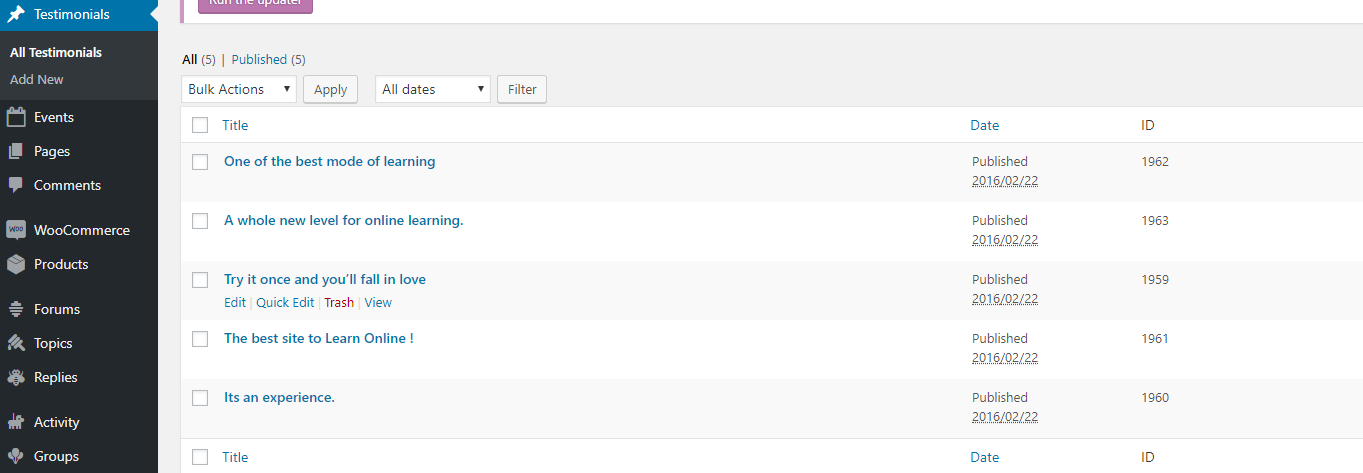
Learn more about Buddypress Emails - Testimonials : This will import default Testimonials from our demos. Testimonials not only let potential clients and customers know what benefits they can expect from what you are offering, but they can also increase your perceived trustworthiness and credibility. The Testimonials are located in WP-Admin > Testimonials.
-
Navigation : This will create default Navigation.
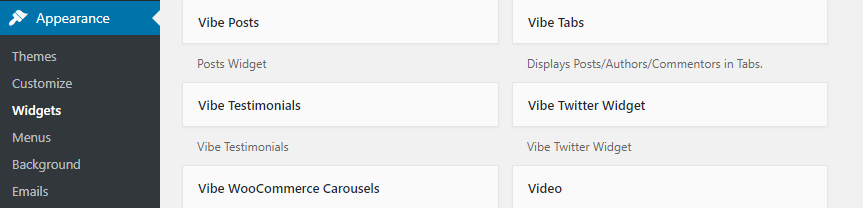
Refer : Course Navigation - Widgets : This will import default widgets from our demos. A WordPress Widget is a small block that performs a specific function. You can add these widgets in sidebars also known as widget-ready areas on your web page. Widgets are located in WP-Admin > Appearance > Widgets. Refer : Widgets
- Vibe Options Panel : This will configure wplms option panel. Vibe Options Panel or WPLMS options Panel is located just below the Appearance section in WordPress admin panel. The panel contains a lot of controlling options for theme. Refer : Vibe Option Panel
- Customizers : This will configure customizer settings to customize your wplms theme. Theme Customizer is located in WP-Admin > Appearance > Customize. Refer : Theme Customizer Guide
- Users : This will configure sample users and profile fields. Users are located in WP-Admin > Users > All Users. An administrator can add new profiles, manage signups, edit profile fields.
- Settings : This will configure default settings(menus location, widget connections, set home page, link course units, quiz questions etc.
- Sliders : This will import sliders. If your slider is not imported properly. Refer : Slider Re-import


Getting Started
How To Register On Wplms Forum
If you want any kind of assisstance and help related to wplms theme you can directly contact us on our forum. We will provide you solutions regarding your issues.
Follow this link to register yourself : Link
WPLMS Multiple Site Setup
WordPress Multisite is a version of WordPress that allows you to run multiple sites off a single installation of WordPress. It makes it possible to run a network of sites under a single WordPress dashboard. You can manage everything including the number of sites, features, themes, and user roles. It is possible to manage hundreds, thousands, and even millions of sites this way. WordPress Multisite is best used when you are building a network of sites sharing similar functionality.
Multiple Site Setup : Link
Creating Courses
Once your WPLMS theme is setup and ready, it is time to create your first course. Although courses can be created from the WordPress Admin (WP Admin) area, we strongly recommend our users to use the intutive front end course creation platform for creating and maintaining courses.
Tip : There is also an option for user guides which would guide you through the course creation process. To enable it simply go to WordPress admin area and click on LMS > Settings and enable the user guided tours. Once you've enabled it, go to your front end profile and click on create course.
To start with your first course simply go to the Course directory and click on the button "create course". You'll be presented with our front end course creation platform. Follow below video tutorial below for detailed overview of course creation.
Front End Course Creation
Note : Every course created using the front end course creation tool must have a name and description to proceed.
Testing Courses
Every logged in user in WPLMS is a student whether an administrator or an instructor. So they can pursue courses just like a student. This presents a perfect opportunity to test your own course as a student.
Tip : WPLMS is independent of eCommerce platforms, so it can be connected to any eCommerce platform, by default we are using WooCommerce for selling courses.
WPLMS Student Userflow
WPLMS Non Logged In Userflow
Student Management
Student management is an integral part of any LMS platform. Sadly very few platforms focus on this area, but unlike others WPLMS has a strong focus on student management for courses.Manage Student course Status in Wplms
WPLMS add Students to course from Course - Admin
For detail tutorial about student management, follow this : Link
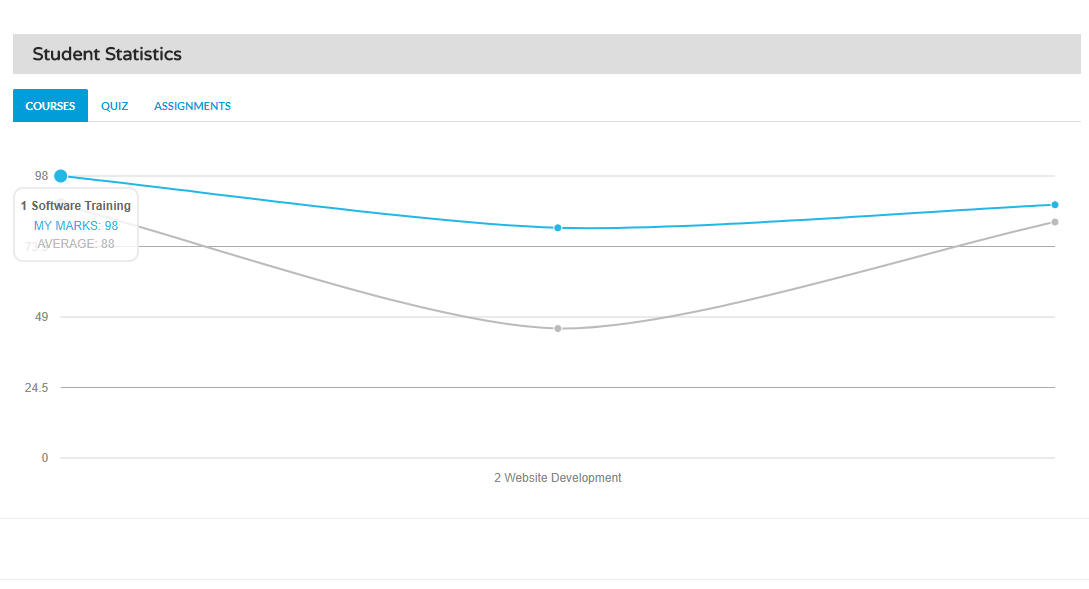
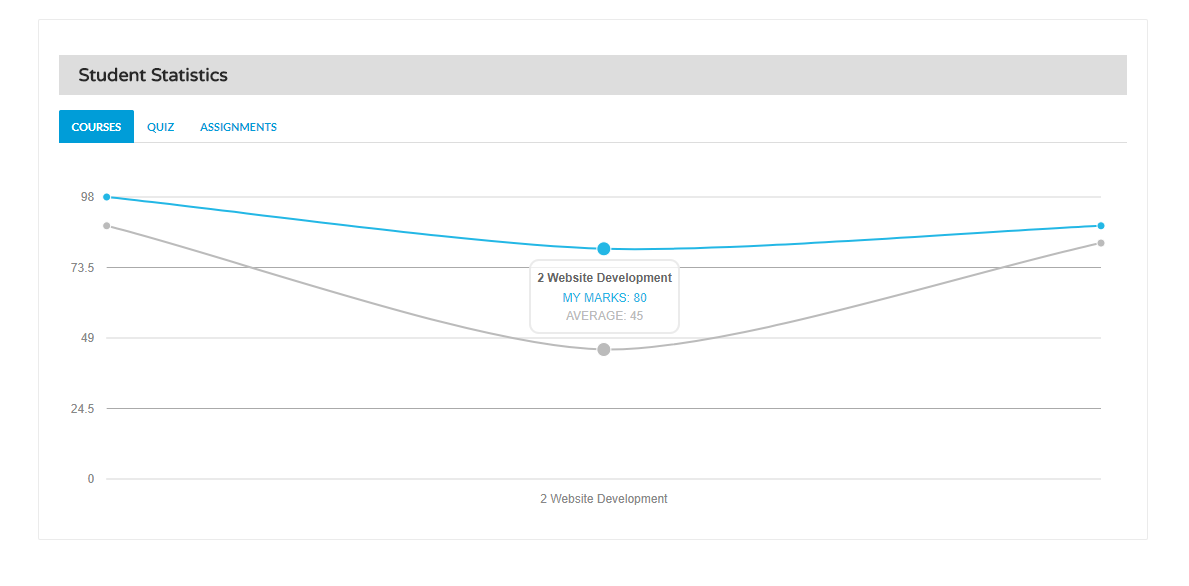
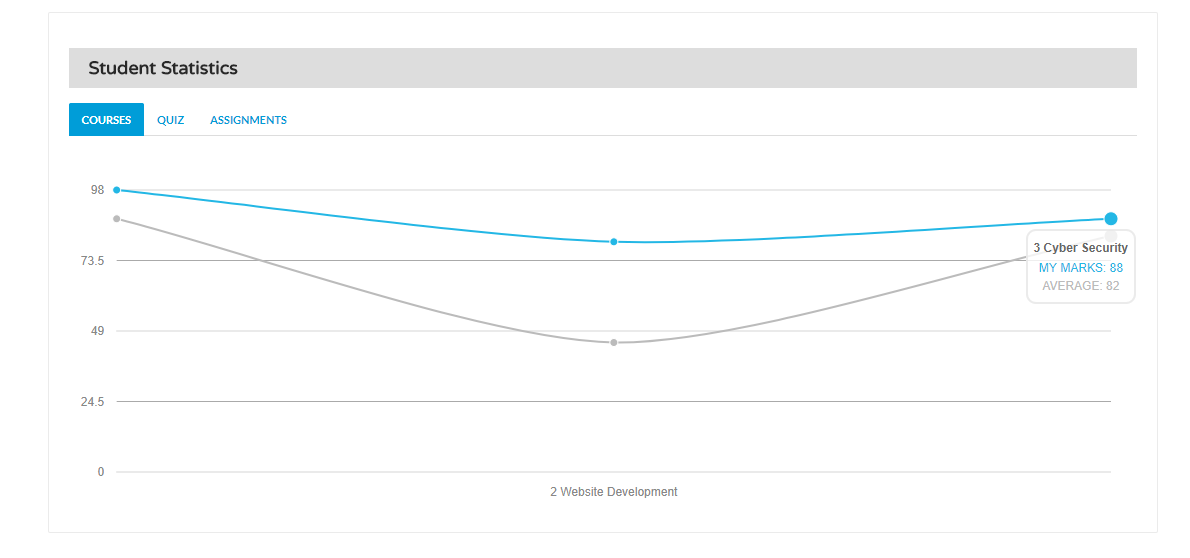
Statistics
To view statistics, Go to wp-admin > LMS > Statistics. You can download your stats by generating stats reports. This area of Statistics is only accessible to Administrator. The Stats section comprises of 4 further subsections as follows.
- Course statistics : It consists information related to no of courses, no of students enrolled in a course, total no of students taking the course, total number of courses finished by students, total number of quizzes finished by students etc.
- User Statistics : All the vital information regarding User/Student can be seen in this section.This statistics contain information about total students, total active students, total course students, score and average in each course.
- Instructor statistics : An Instructor can view his own statistics as well as users statistics. All the vital information regarding Instructors can be seen in this section. Each Instructor with Number of Courses, number of certificated awarded by instructor, number of badges awarded by instructor and the average score of students in this Instructor's course and total number of students in this Instructors courses. There is only one condition when instructor can also view administrator statistics when instructors have administrators right or an instructor is an admin also.
- Administrator Statistics : All the vital information regarding Administrator can be seen in this section. An Administrator can view instructors statistics but vice versa is not possible.
For detail tutorial about statistics, follow this : Link
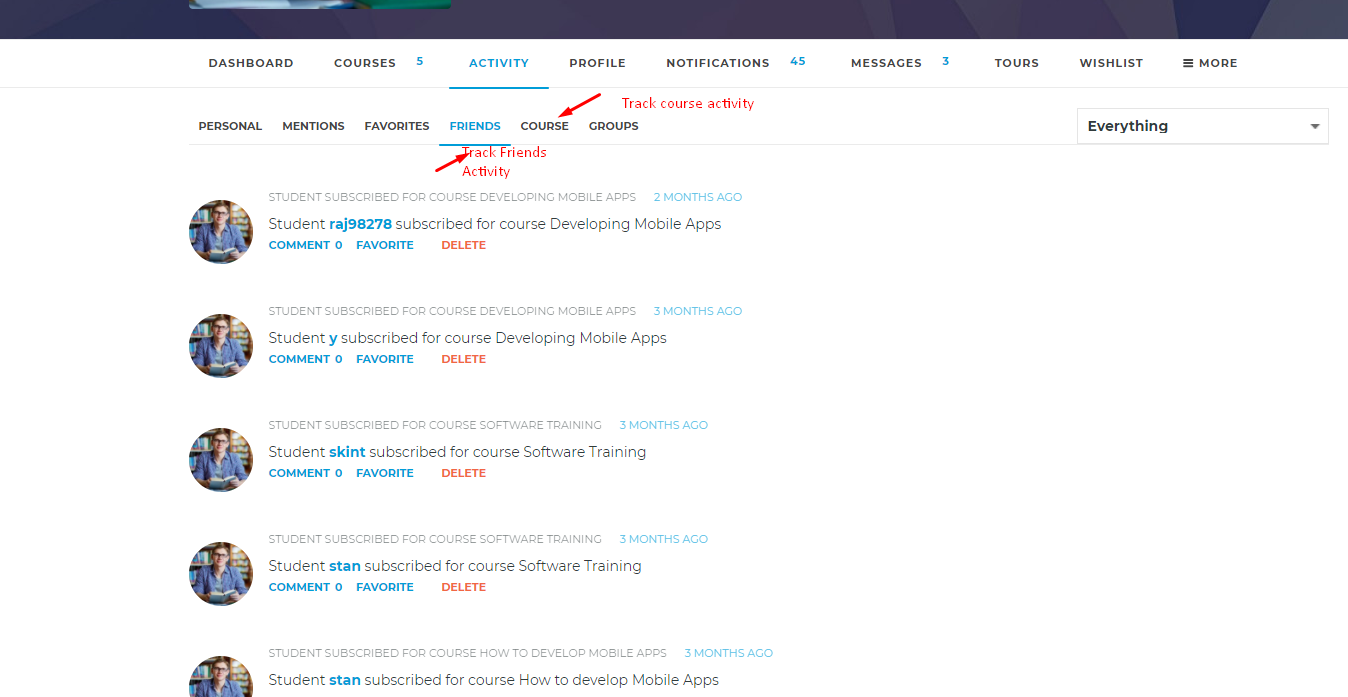
Activity Tracking
Activity recording is one of the most important parts for any LMS platform. You may want to know what is going on in your courses. When a student accessed the course, when he finished and so on. This helps instructors to improve their courses. An instructor can track all users activities through his dashboard > activity. Activities in WPLMS can be synced with external LRS ( Learning record stores) a concept from TinCan/xAPI where in LMS's are required to send out statements to LRS thus removing the dependency on LMS of instructors for activity tracking.
- User : Track a specific user activity.
- Global : Track all activities.
- Course Activity : Track how many students started the quiz.
Instructor Commissions
WPLMS being a dynamic platform for eLarning can also be converted into a marketplace site. The popular concept "MOOC" (Massive Open Online courses) can be easily acomplished using WPLMS. Many of the top sites using WPLMS are competing with global brand names like Udemy, Coursera, KhanAcademy etc.
Using this feature you can invite other instructors to publish courses on your WPLMS site and then award them with commissions based on every sale for their courses. This way you can get more courses and students in your site and turn your eLearning store into a complete business generating good amount of revenue.
Below video explains how this flow works.
WPLMS Instructor Commissions
Quizzes and Assignments
WPLMS boasts of an incredibly flexible and powerful quizzing system. Quizzes in WPLMS are independent entities unless they're connected to courses. You can even use WPLMS as a quizzing platform and sell quizzes using our free addon plugin.
The quiz in WPLMS supports 10 question types, which can be easily created using the question template creator.
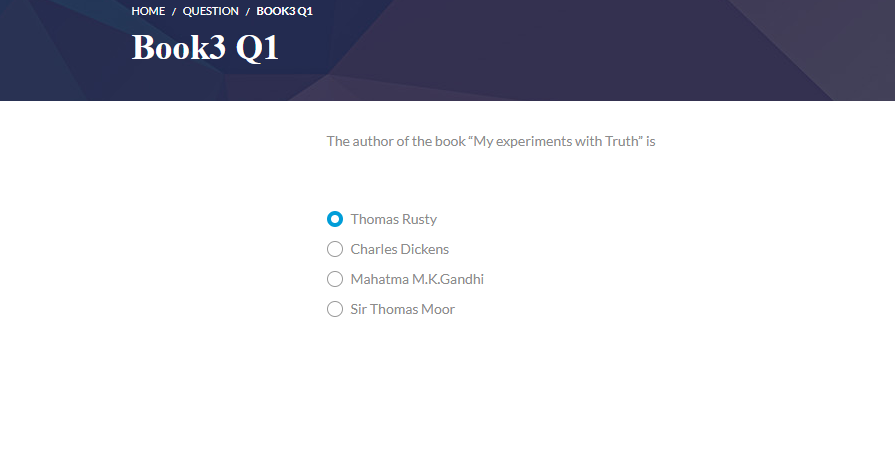
- Multiple Choice : A question type with multiple answers choice.
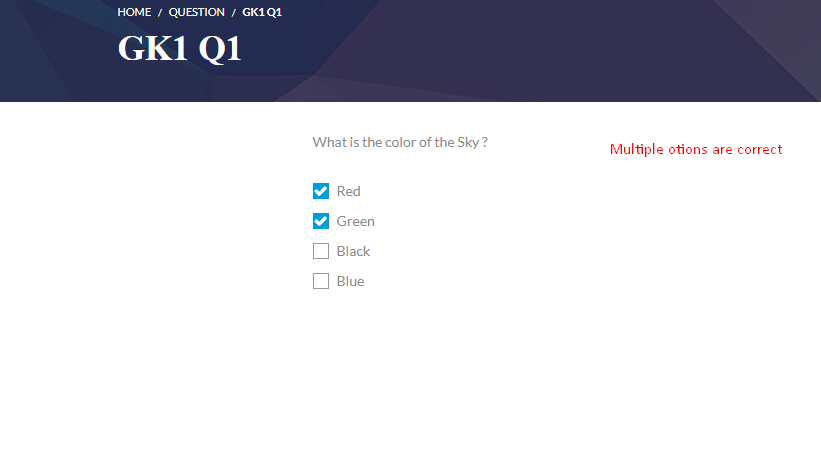
- Multiple Correct : A question type in which multiple answers are correct.
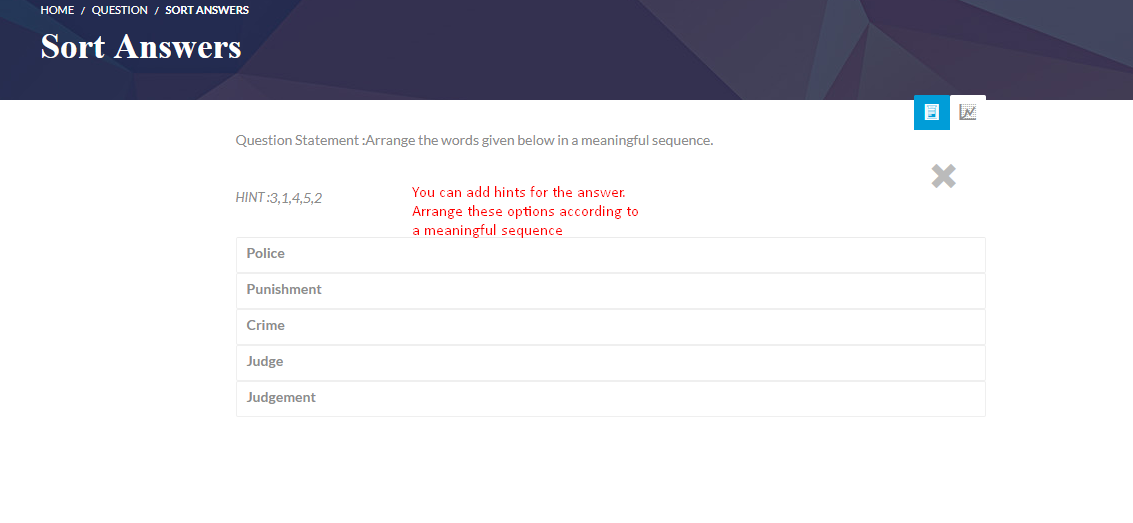
- Sort Answers : To randomize your possible answers, you can use sort answer type questions.
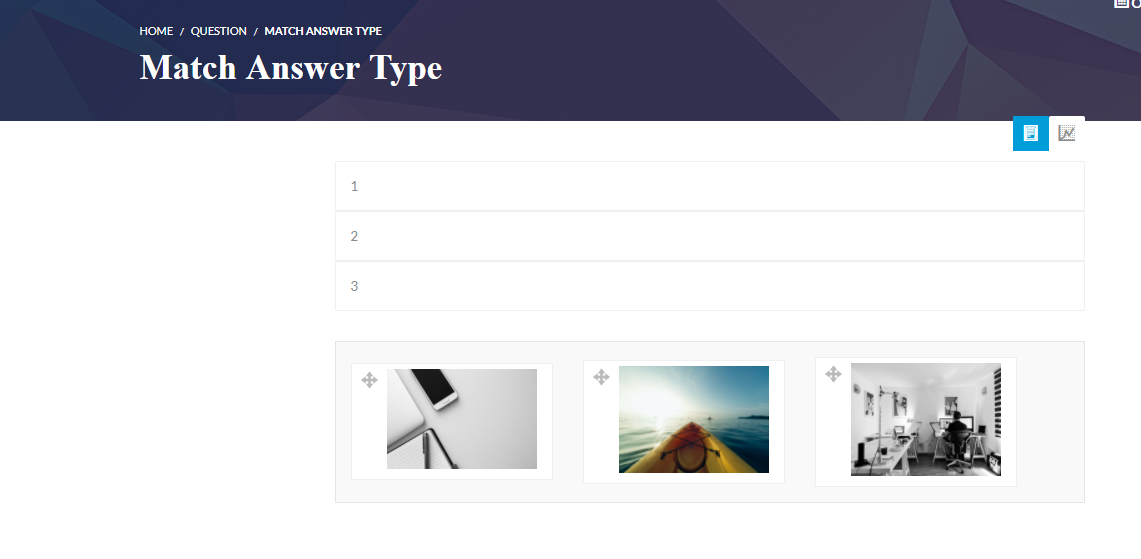
- Match Answers : A question type in which question match with one of your acceptable answers.
Refer the tutorial : Match Answers Question TypeTo add images in question : Tutorial
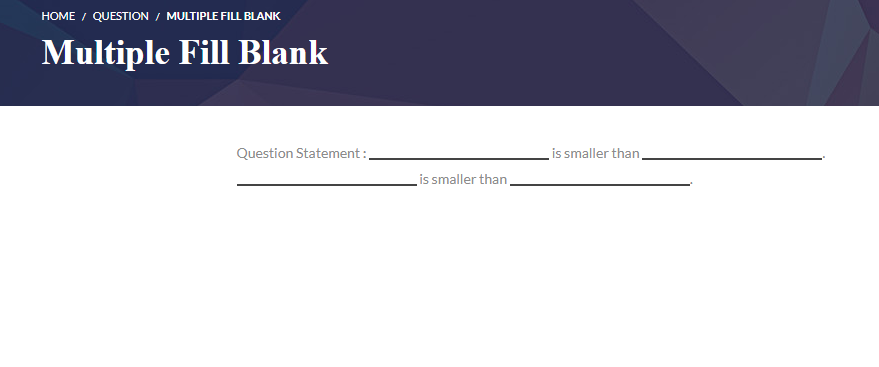
- Fill in the Blanks : A question type in which you have to fill the blanks given in the question with correct answers. An instrutor can also create multiple fill blanks and select dropdown type questions.
Refer the tutorial : Creating Fill in the blanks - Drop Down Select : Multiple Answers given in the drop down list, and you have to select possible answer from the drop down list.
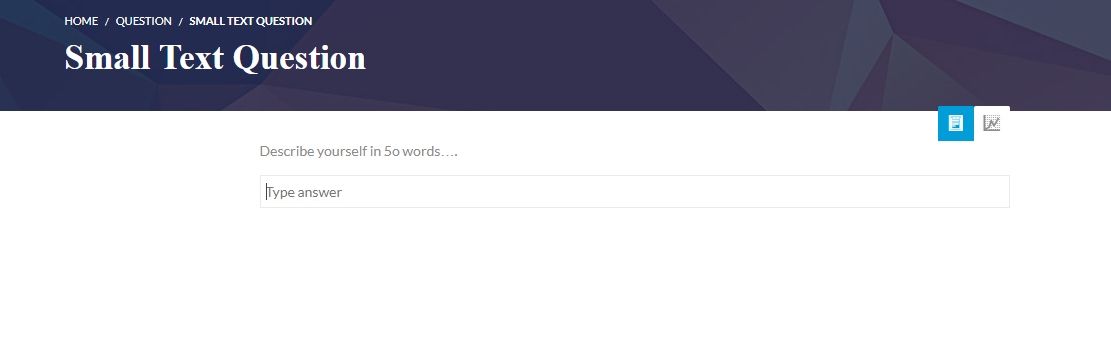
Refer the tutorial : Multiple Fillblanks and Select dropdowns in questions - Small Text : A question type which require short descriptive answers.
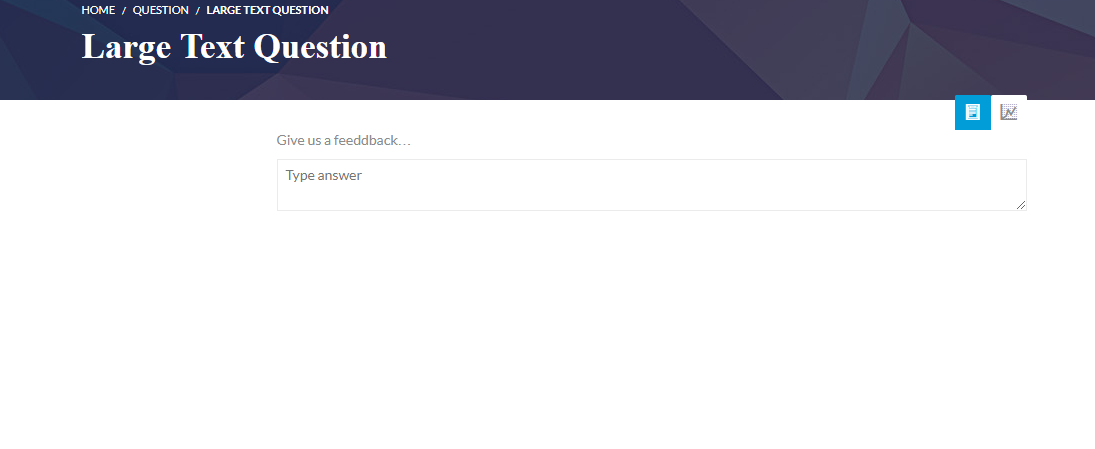
- Large Text : A Question type which require descriptive long answers like essay writing etc.
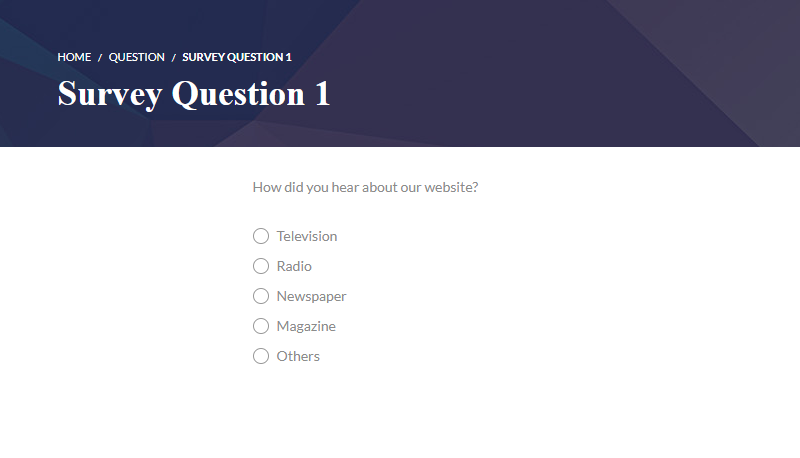
- Survey Type : This is basically survey type questions. These types of questions are used for data analysis purpose.
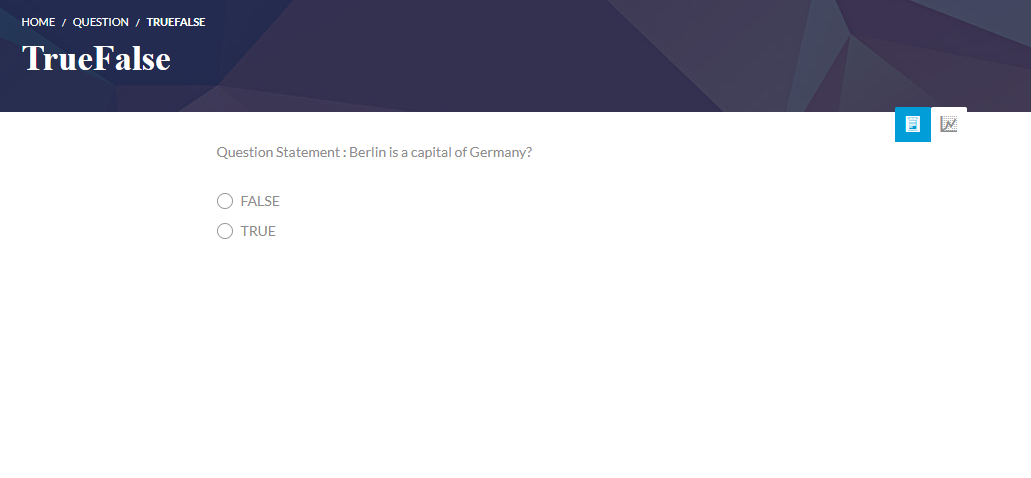
Refer the tutorial : Survey Question Type - True or False Type : These types of questions consist a statement which is either true or false.
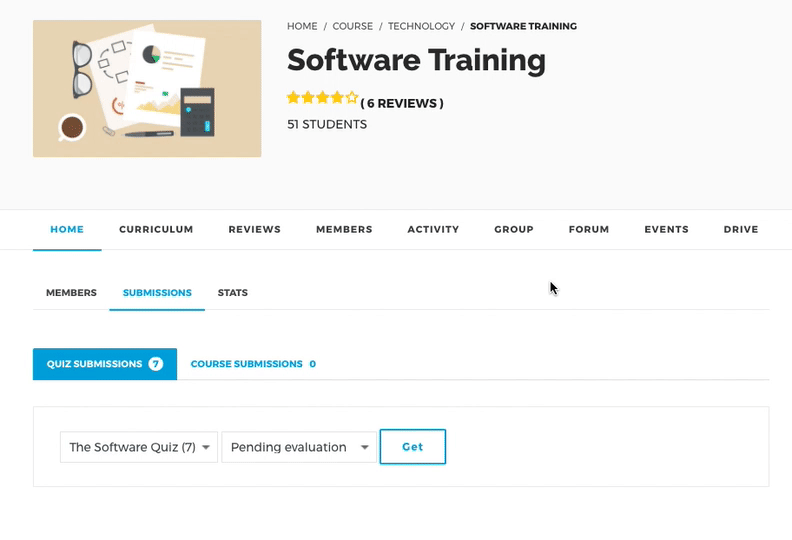
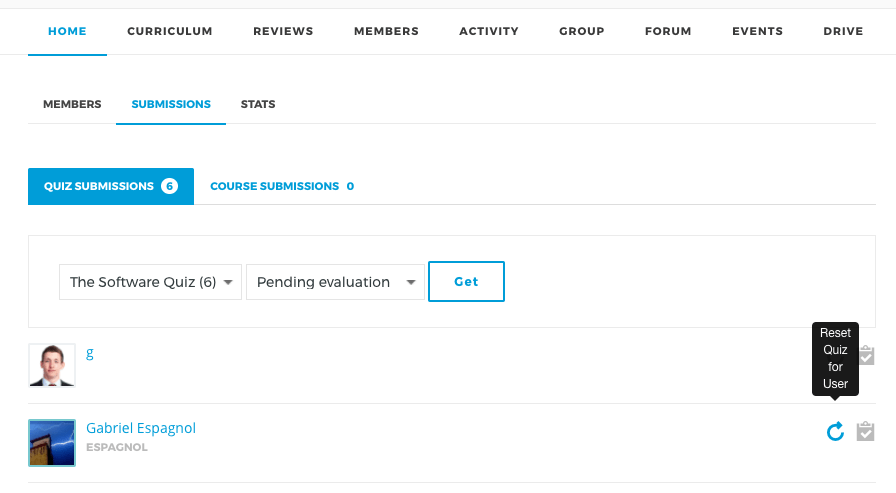
The quizzes can be manually and automatically evaluated, you can also re-evaluated an already evaluated quiz for a student.
WPLMS Manual Quiz Evaluation
WPLMS Quiz Reset
Dynamic quizzes, quizzes can select questions randomly from a pool of questions. You can create a quiz wherein the questions are picked from various tags and you can set the marks for each question picked up from the tag.
Refer full video :
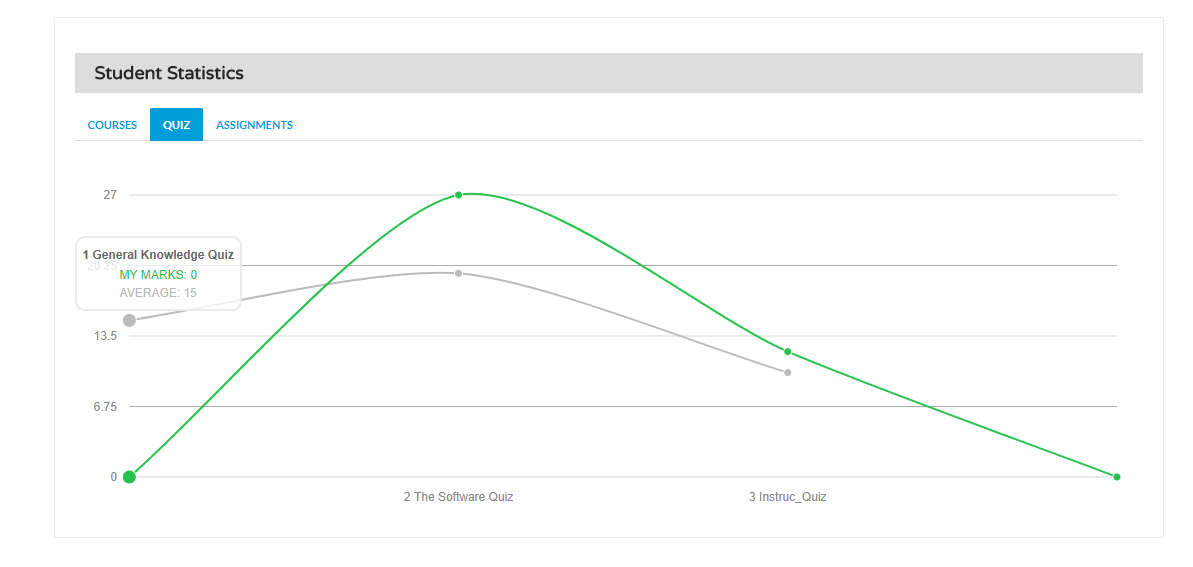
Quiz scores are visible in form of graphs in the Student Stats widget in the dashboard.
Assignments are like homework where in the user is required to upload documents. The assignment can be timed or unlimited duration. The instructor can select the type of attachment for each assignment and the maximum size of the attachment submitted by the student. Assignments when tied to courses also add into the course evaluation score or grade.
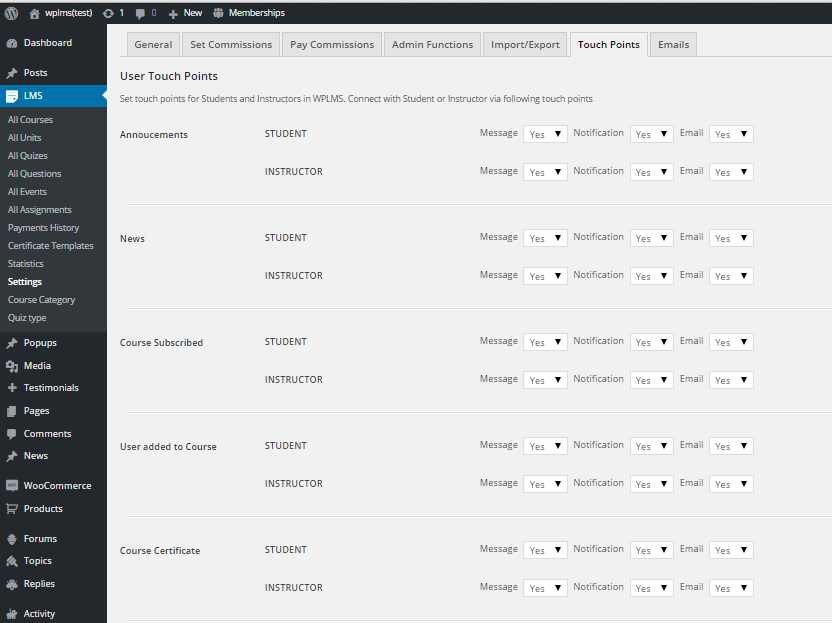
User Touch Points
Set the touch points for student and instructor in wplms and connect with them via these touch points. Touch points are set for getting the notification,message and email when they are triggered. To enable these touch points, go to wp-admin > LMS > Settings > Touch Points. You can set these touch points individually for students or for instructors as well as for both.
To configure touch points settings, Follow below video tutorial for detailed overview of touch points.
Refer full video :
Re-starting setup wizard
In some cases you might be required to restart the setup wizard. First you need to identify that you want to import selected components in your setup or completely clear the site and re-start the setup wizard
To import selected components : follow below steps:
- Login to your WordPress Admin pabnel (WP-Admin)
- Go to WP admin - Appearance - Setup Wizard
- You'll be prompted with a screen which has a blue button "Restart the setup Wizard"
- Click on the button to restart the setup wizard
- Make sure you "Skip the step" which you do not want to repeat
To clear entire site and restart setup wizard : follow below steps:
- Login to your WordPress dashboard
- Go to Plugins - Add New section
- Search for plugin : WP Reset
- Install and activate the plugin
- Now, go to WP admin - Tools - Reset
- Enter the text wp-reset and click on reset.
- This will clear all data from your site and set the starting* WP admin username and password. Starting* wp admin details which you entered while installing your wordpress site.
- Login to your WP admin panel again with your starting credentials
- Go to Appearnce - Themes
- Activate the WPLMS Blank child theme (recommended) or the main WPLMS Theme
- You'll most likely see buddypress activated screen, go to WP Admin - Install WPLMS
- You'll see a button to start the Theme Setup Wizard
- Click on it and the Setup wizard will run again.
Like WPLMS ?
Rate us at Themeforest
Every rating counts and helps us to improve WPLMS. How to rate WPLMS ?
Not Happy ?
Send us an email at vibethemes@gmail.com and share feedback.